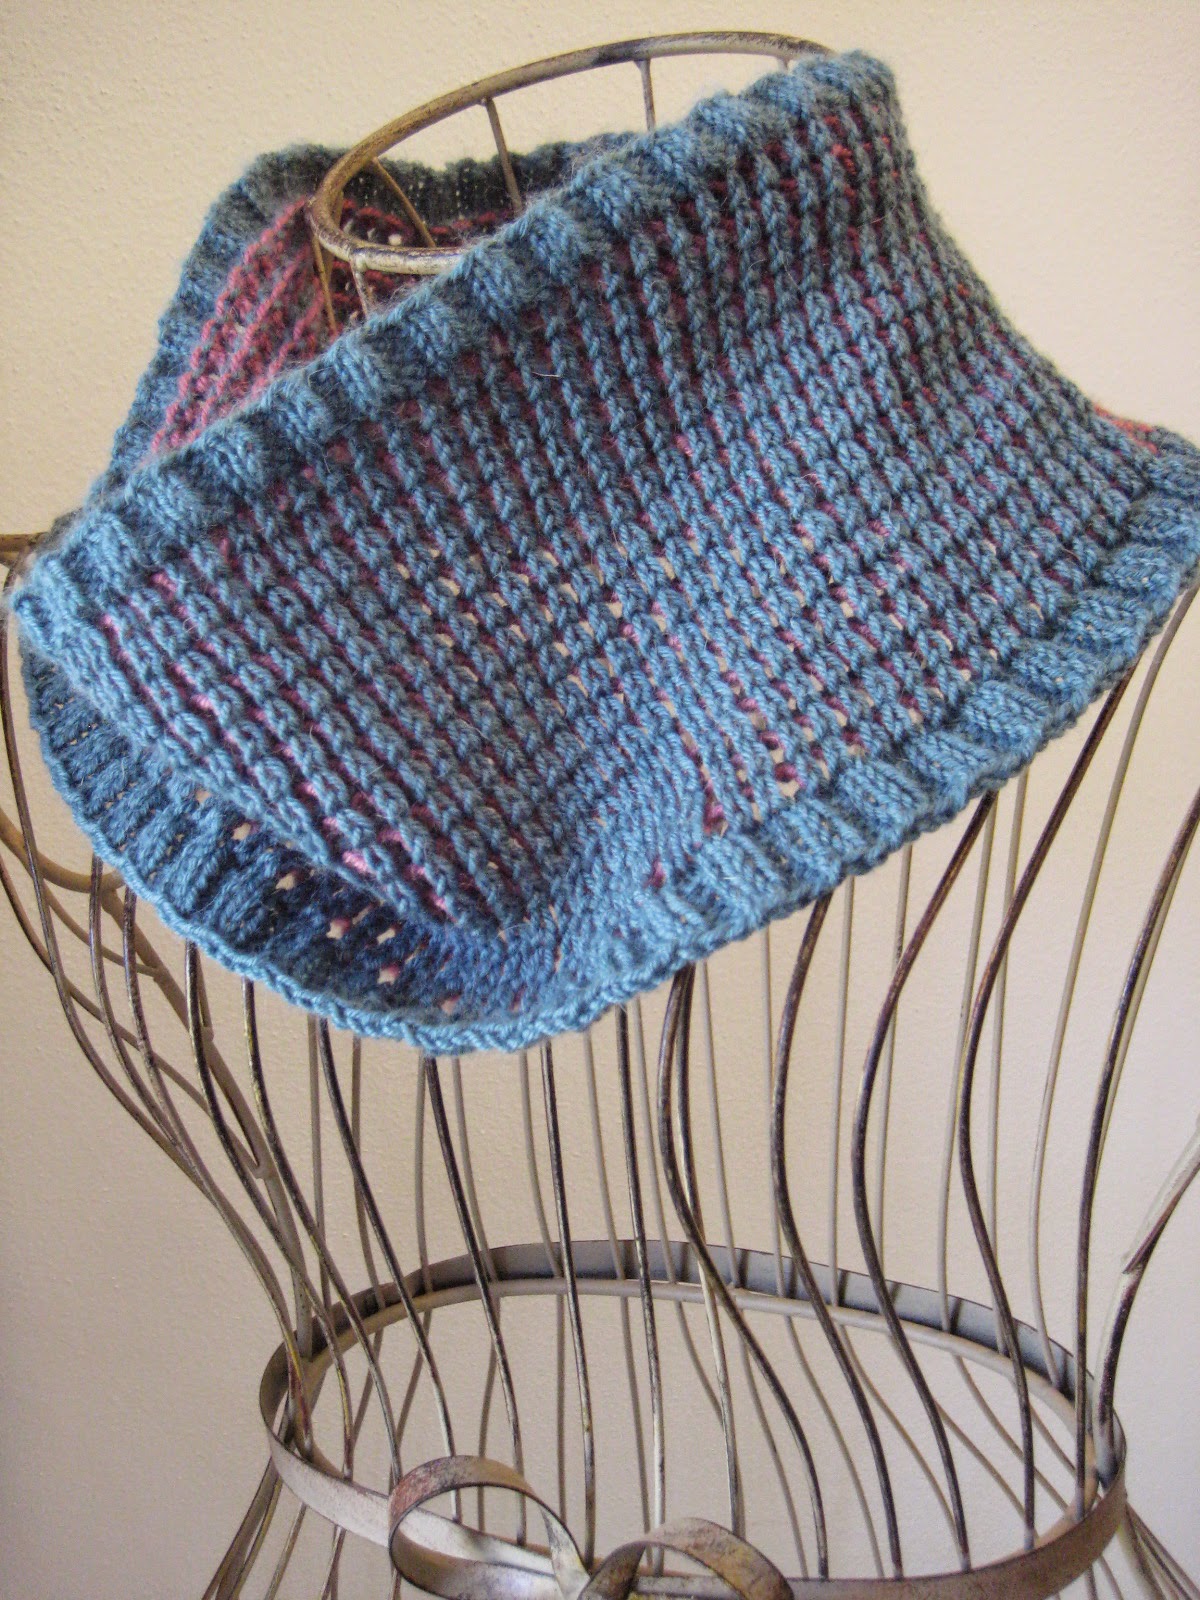
Tuesday, May 6, 2014

Mirage Cowl

Mirage Cowl

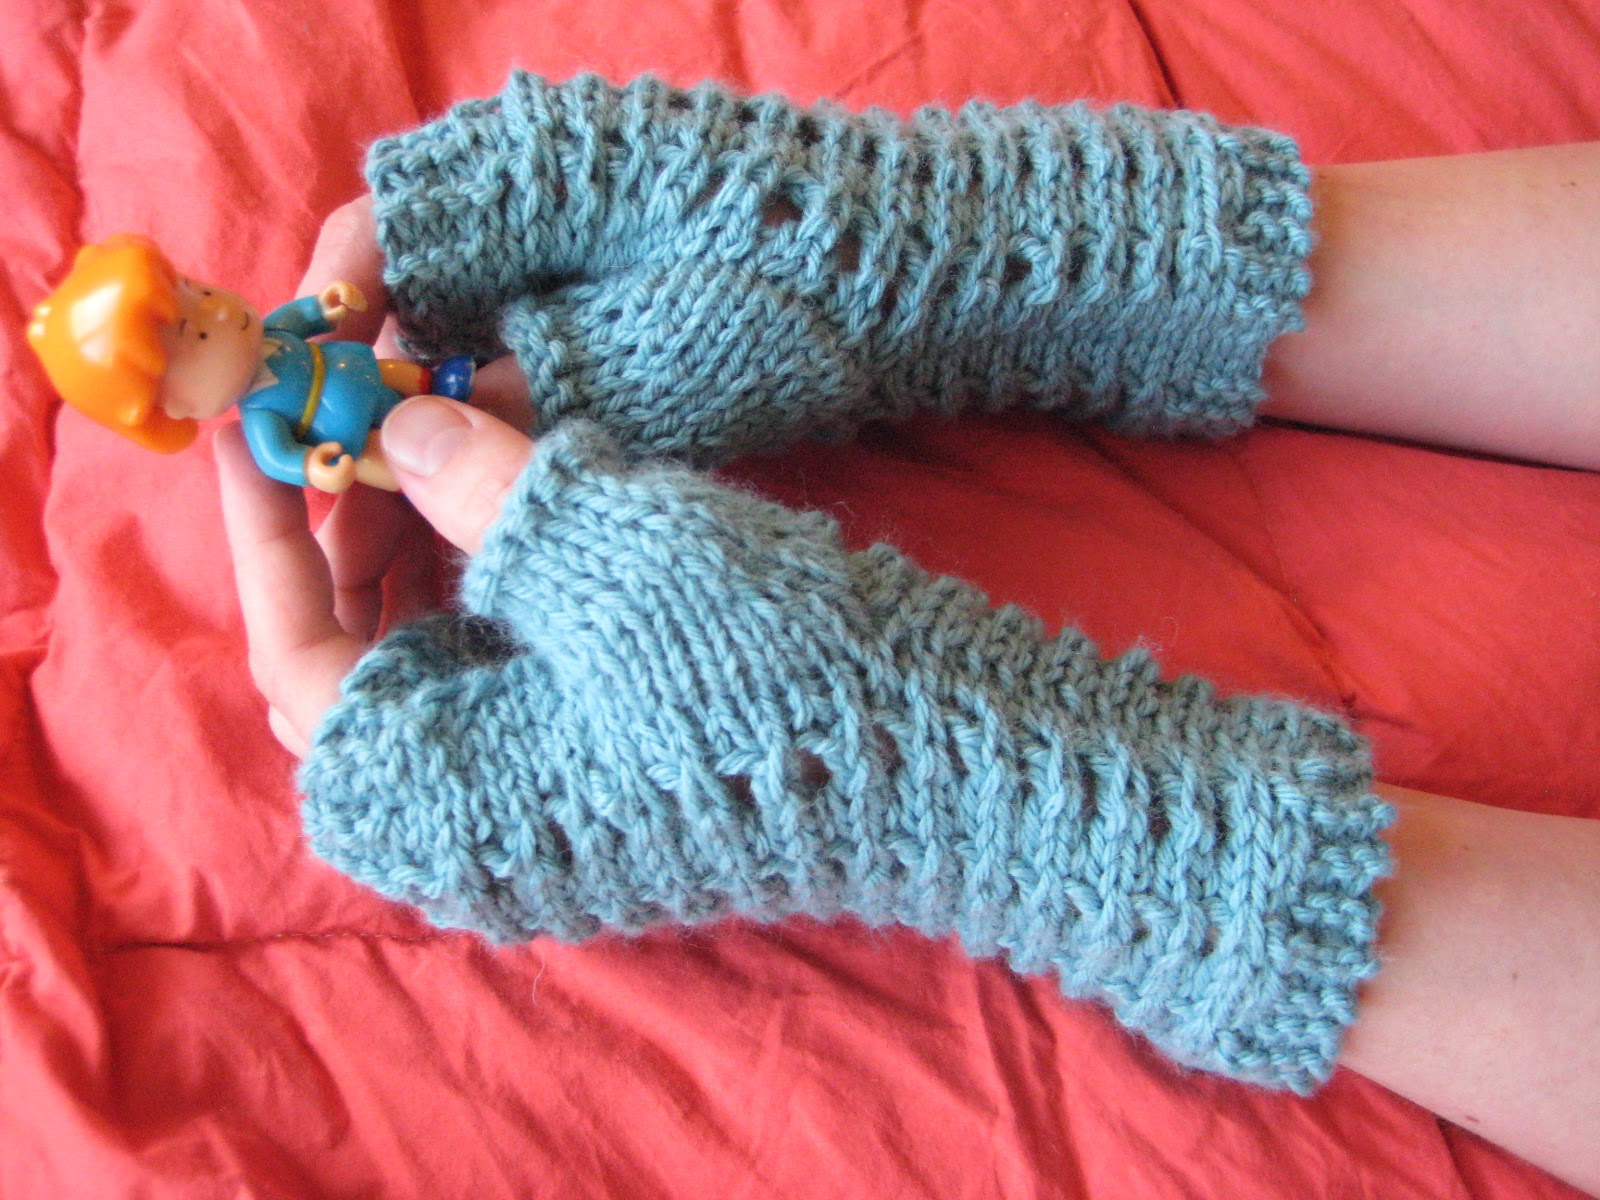
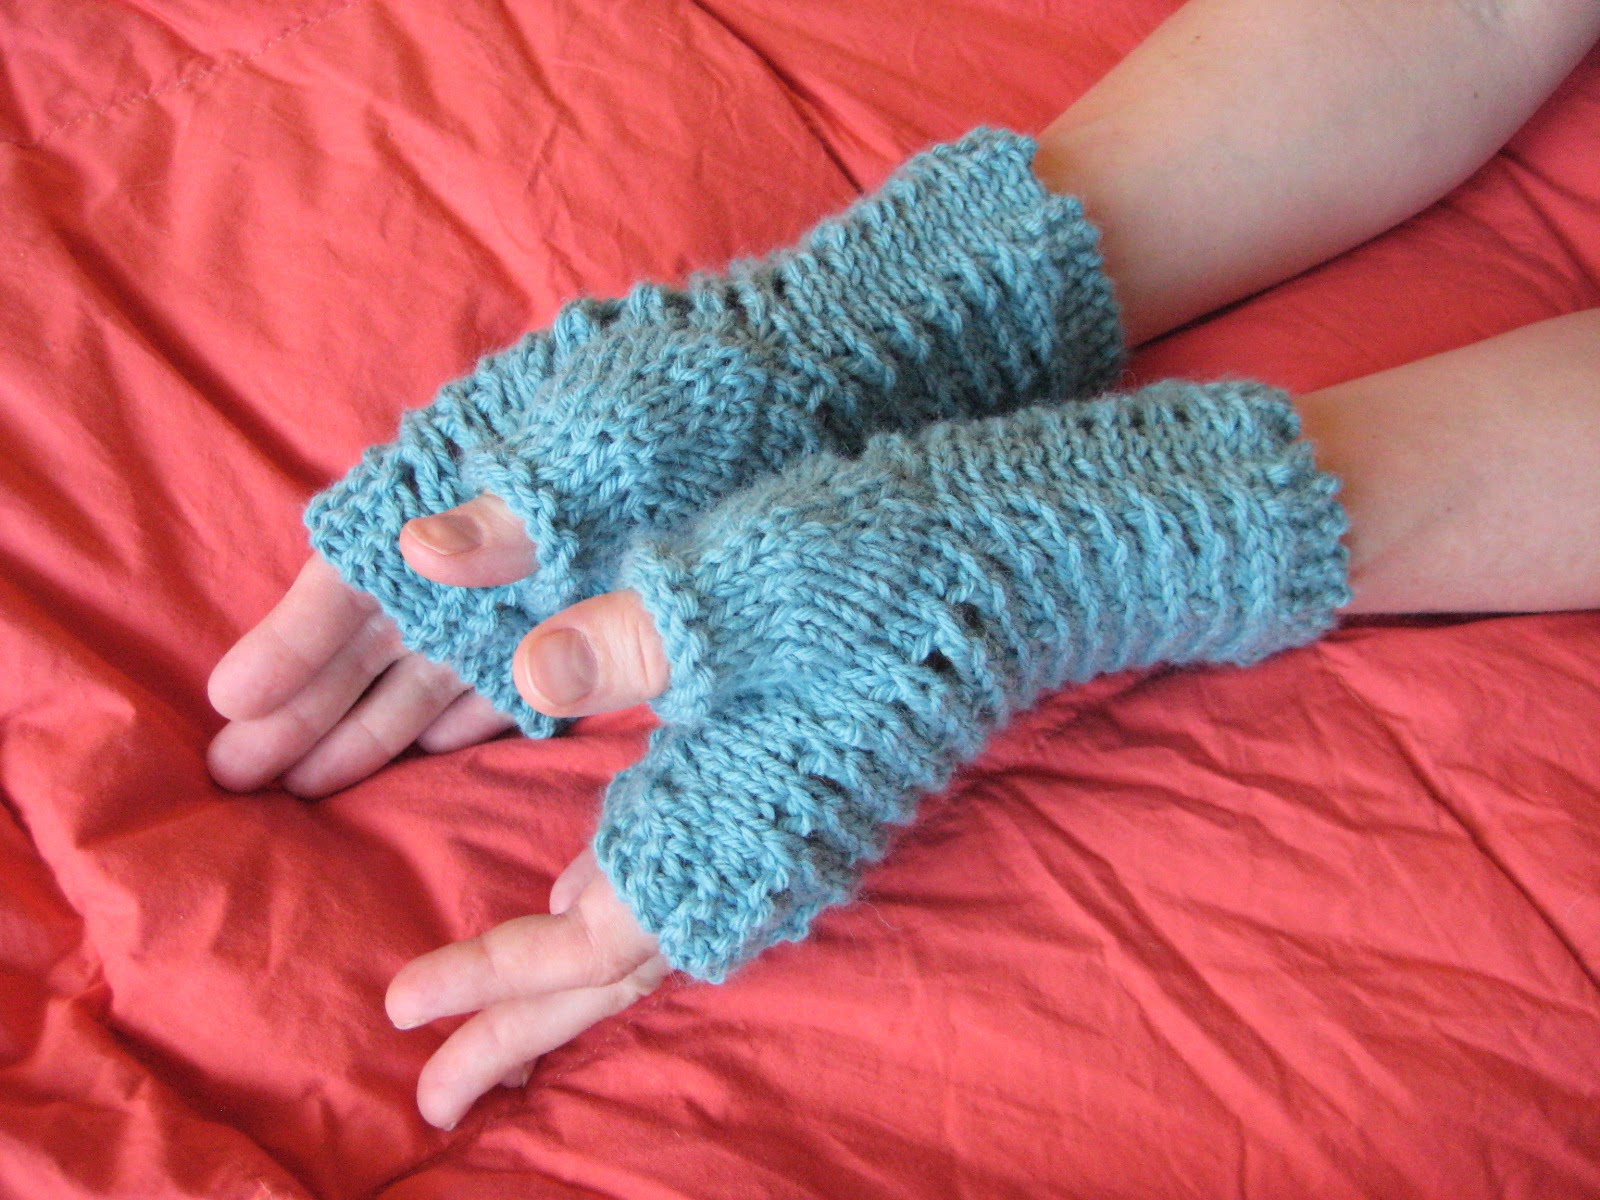
When I first bought this yarn, I had no clue how I was going to use it (well, I knew I would use the two shades together - I love this color palette). And then I made the Slip-Stitch Mesh Fingerless Gloves and matching hat and the Water Lilies Cowl, and I saw a nice opportunity to combine variations on the slip stitch patterns I used for those pieces to maximum effect. Long story short, while the pictures don't quite do the front slip stitch pattern justice, color-wise (the pink shows up behind the teal a bit more in person than it does in the photos), the combination of the two is quite striking in this closer-fitting cowl.

Yarn: Regia Angora Merino (65% New Wool, 25% Polyamide, 10% Angora; 219 yards [200 meters]/50 grams); #7083 Teal - one skein (color A) & #7080 Fuchsia - one skein (color B)

My attempted close-up of the mirage-like color pattern.
Or something.
Needles: One 20" circular needle in size US 2

Notions: Tapestry needle, three stitch markers

Gauge: 30 stitches = 4 inches

Using your color A yarn, cast on 160 stitches, place marker, and join in round. Then we'll knit four rows in a k2, p2 ribbing, followed by a knit row during which you'll place your extra stitch markers 20 stitches from either side of your row marker. And then, we'll move on to the main pattern, which is...

Row 1: using color B, * k1, slip 1 with yarn in back (wyib) * until you reach first marker, m1l, slip marker, k2, and * slip 1 wyib, k1 * until you reach second marker; then, slip marker, m1r, and * slip 1 wyib, k1 * until end of round

Friday, May 2, 2014

Slip-Stitch Mesh Hat

Slip-Stitch Mesh Hat

After I finished the Slip-Stitch Mesh Fingerless Gloves, I figured I had just enough yarn left in my skein for a hat. And it seemed like a good idea to make a hat that matched the gloves, since they're knit from the same stuff and all. So, if you're interested in knitting the smaller size of the gloves and the hat as written (I give a variation to make it slightly larger below, and I'm not sure you have enough yarn to accomplish it if you're making the gloves too), you can probably do it with just one ball. Otherwise, of course, they're both good stash projects that don't use too much yardage!

The back. Simple and clean.
Yarn: Berroco Vintage (52% Acrylic, 40% Wool, 8% Nylon; 218 yards [200 meters]/100 grams); #5120 Gingham - one skein

Needles: One 16" circular needle in size US 9, one 16" circular needle in size US 7, one set of double pointed needles, also in size US 9

Notions: Tapestry needle

Gauge: 18 stitches = 4 inches on size 8 needles

Using your size 7 needle, cast on 90 stitches, place marker, and join in round. Knit one inch in a p1, k1 ribbing and then switch to your size 9 needle. And then, we'll be moving on to the main pattern, which uses a variation on Slip-Stitch Mesh from page 156 of Barbara G. Walker's A Treasury of Knitting Patterns, and goes as follows:

Tuesday, April 29, 2014

Slip-Stitch Mesh Fingerless Gloves

Slip-Stitch Mesh Fingerless Gloves

The idea behind this pair of fingerless gloves was simple; not everyone likes to knit on double pointed needles, but even the dpn-adverse should be able to enjoy a nice fingerless glove. And as far as these bad boys are constructed, we'll begin by working the thumb, then we'll make the body of the glove, and then we'll put them all together!

Thumbs up, if you will...
Sizes: smaller (for a hand roughly 7 1/2" - 8" in circumference at the base of the thumb) and larger (for a hand roughly 8 1/2" - 9" in circumference at the base of the thumb) - directions for larger size will follow those for the smaller size in parentheses

Yarn: Berroco Vintage (52% Acrylic, 40% Wool, 8% Nylon; 218 yards [200 meters]/100 grams); #5120 Gingham - one skein

Needles: One set of straight needles in size US 8 (optional: another set of straight needles in size US 7)

Notions: Tapestry needle

Gauge: 18 stitches = 4 inches

So, as I mentioned, we'll begin with the thumb. And, if desired, here's your chance to use a smaller gauge needle, if you want the thumb to fit a little more tightly. Either way, the thumb will look better if you knit on the tighter side of things through the short rows. Anyway, cast on 14 stitches (16 for the larger size) loosely, and then purl one row across. And then we'll work the following (notice that you will be working short rows from row 4 - 12. There's a nice tutorial on the technique here, if you're rusty):

Friday, April 25, 2014

Water Lilies Cowl

Water Lilies Cowl

Somewhat unbelievably, even after making the Razor Shell Fingerless Gloves and the Staghorn Fingerless Gloves out of my single skein of Berroco Ultra Alpaca Fine, I still had a bunch left. And because I love to pair variegated yarns with similarly-colored single-color skeins, I thought it would be a perfect opportunity to use up the Crystal Palace yarn I originally bought for the Starry Night Cowl. Long story short, the Water Lilies Cowl uses two sock weight yarns, a slip stitch color pattern, and a simple striped rib to make a nice, closer fitting design whose top portion is entirely reversible, for drape.


A close-up of the slipped stitch pattern.
Yarn: Crystal Palace Yarns Panda Superwash (51% Bamboo, 39% Superwash Wool, 10% Nylon; 186 yards [172 meters]/50 grams); #2004 Mint Print - 1 skein (color A), Berroco Ultra Alpaca Fine (50% Superwash Wool, 20% Super Fine Alpaca, 30% Nylon; 433 yards [400 meters]/100 grams); #12177 Kaffir Mix - one skein (color B)

Needles: One 20" circular needle in size 2

Notions: Tapestry needle and stitch marker

Gauge: 30 - 31 stitches = 4 inches in stockinette

Using your color A yarn, cast on 180 stitches, place marker, and join in round. Next, purl 5 rows for the edging. Then, knit one more row. And then, it's time to begin our first pattern, which is Corn on the Cob Stitch from page 54 of Barbara G. Walker's A Treasury of Knitting Patterns. And it goes like so: