Saturday, March 8, 2014

Field of Tulips Cowl

Field of Tulips Cowl

I grew up near the Skagit Valley in Washington, which celebrates spring each year with a tulip festival that drives all the locals nuts with insane traffic. On the plus side, of course, is the acres and acres of tulips all blooming at once, and of which this cowl reminds me. Or in other words, I designed this in what I consider to be the spirit of spring, and in tulip-y colors. It also combines two slip stitch patterns which evoke two different plowed-fields effects.

Yarn: Cascade Yarns Sierra (80% Pima Cotton, 20% Merino Wool; 191 yards [175 meters]/100 grams); #03 Vanilla - one skein (color A), #21 Royal Blue - one skein (color B), #55 Sunset - one skein (color C)

Needles: One 24" circular needle in size 8, one 16" or 20" circular needle, also in size 8

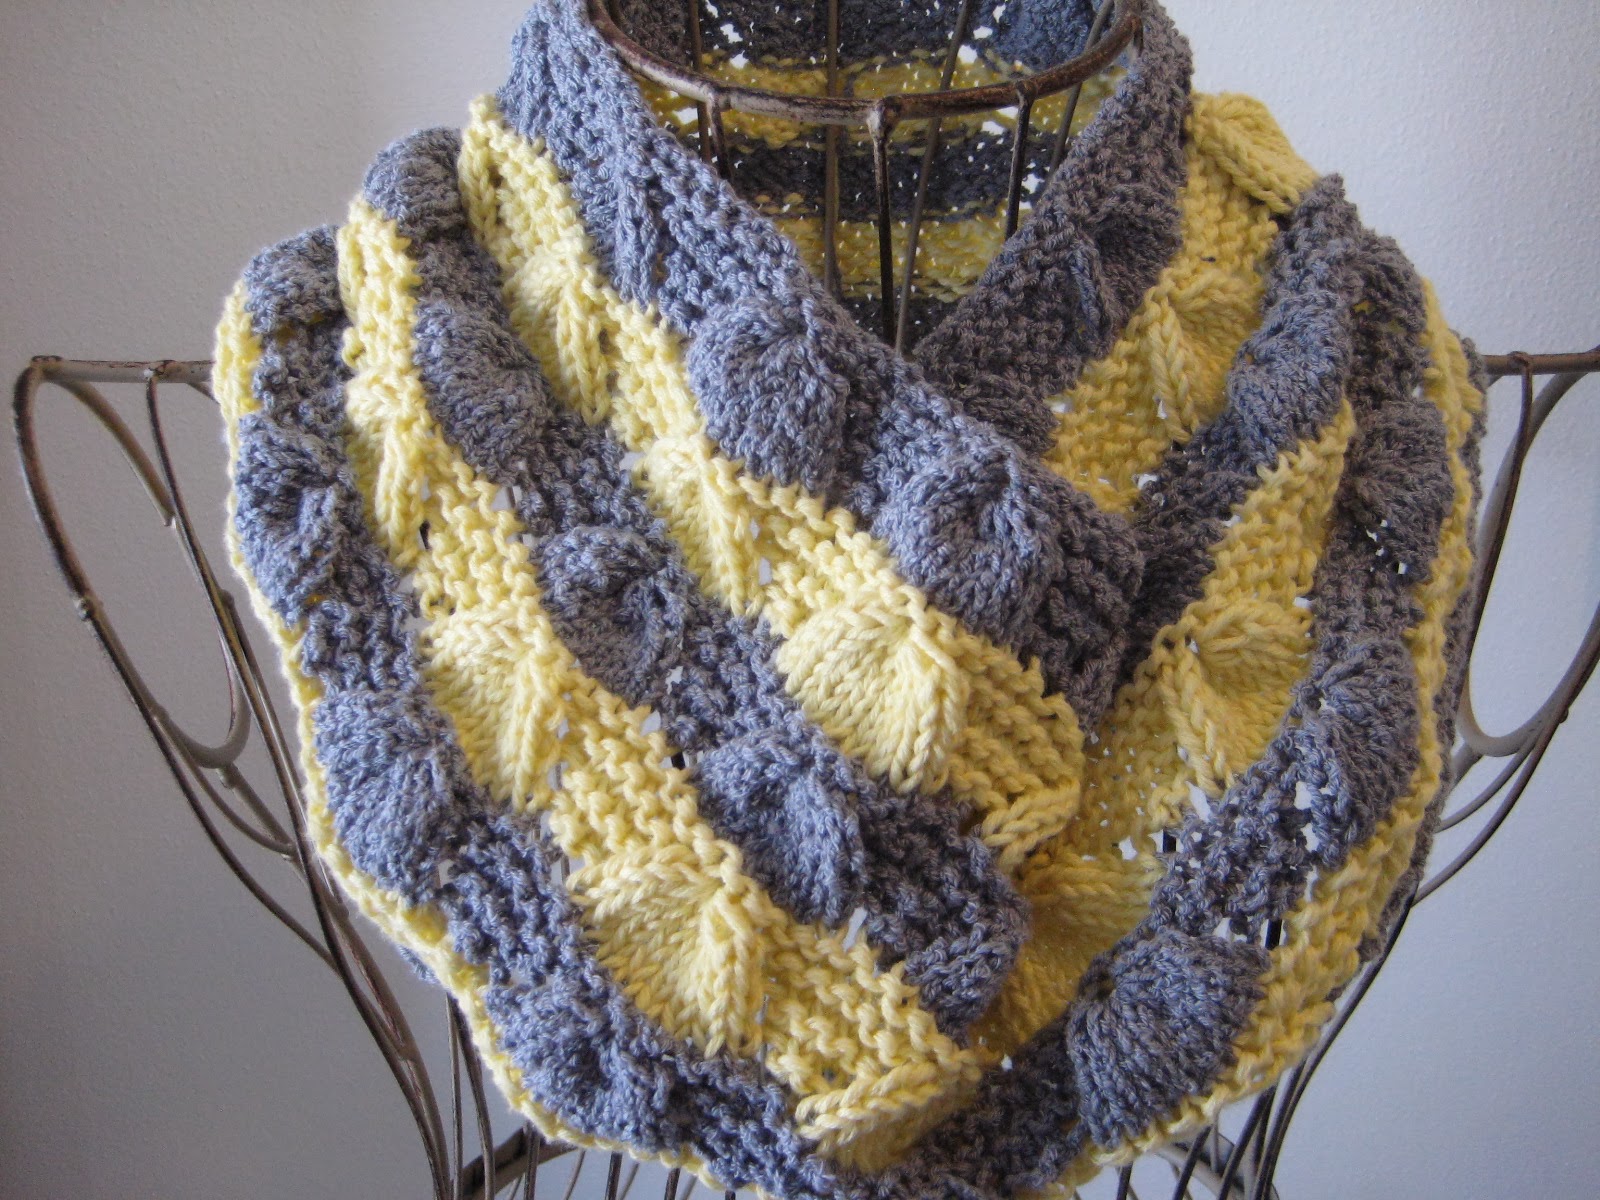
The back; the slip stitch color pattern reminds me
of the fields.
Notions: Tapestry needle, three stitch markers

Gauge: 18 stitches = 4 inches

Using color A and your 24" needle, cast on 149 stitches, place marker, and join in round. Knit 20, place extra marker, and then knit until you're 20 stitches from the end of the round and place another marker. Knit until the end of the round. And now, let's get right to the pattern, which you'll find below. As you'll notice, you will have fewer stitches on your needle on rows 3 and 9, which you'll add back on rows 4 and 10.

Wednesday, March 5, 2014

Little Arrowhead Fingerless Gloves

Little Arrowhead Fingerless Gloves
I went with Legos for the photo this time.

As promised, I'm adding more fingerless gloves to the repertoire. And the Little Arrowhead pair has a couple of nice features, including a simple repeating lace pattern and the fact that both gloves can both be knit from the same pattern (so no left hand, right hand mumbo jumbo!). I should note, however, that these gloves are designed with a slightly looser fit in mind (as you can see from the pictures, they're not stretching tight over my hands or anything), and if you want them to be snug, you may want to knit them a size smaller than I give directions for. In fact, if you have itty bitty hands and want really tight gloves, I would even recommend casting on 45 stitches instead of the small size's recommended 54, omitting those 9 stitches from your second dpn. Remember, however, that this will make your cast-on and cast-off edges tight, and you'll have to take extra care to cast on and bind off such that you can still get your hands in these bad boys!
I just realized why I like this color.
It's the same shade we painted the house!

Sizes: smaller (for a hand roughly 7 1/2" - 8" in circumference at the base of the thumb) and larger (for a hand roughly 8 1/2" - 9" in circumference at the base of the thumb) - directions for larger size will follow those for the smaller size in parentheses

Yarn: Schoeller + Stahl Baby Micro (51% Virgin Wool, 49% Acrylic; 106 yards [97.5 meters]/25 grams); #04 Light Blue - two skeins

Needles: One set of double-pointed needles (dpns) in size 3, one set of dpns in size 2

Notions: Tapestry needle

Gauge: 26 stitches = 4 inches

Using your size 2 dpns, cast on 54 stitches loosely (63 stitches) and distribute among your dpns as follows: 18 stitches on your first needle, 18 stitches on your second needle, and 18 stitches on your third needle (for the larger size: 18 stitches on your first needle, 27 stitches on your second needle, and 18 stitches on your third needle). Join in round, and then we'll knit the following ribbing row:

Monday, March 3, 2014

Turquoise V Cowl


Turquoise V Cowl


I knew I had to have this yarn as soon as I saw it; the colors, the feel (it's a bit ropey, but soft), and the general aesthetic of the fiber really appealed to me. But then I struggled a bit more when it came to knitting it up, tearing through who-knows-how-many ideas before settling on this one. And, in short, this one relies on a cabled edge down one side of the cowl and a stitch pattern which adds and drops stitches for a very textured effect. Furthermore, while the pattern below looks complicated, that's mostly just increases and decreases along the edge; the basic stitch pattern remains the same throughout.

The stitch pattern, closer up.
Yarn: Schachnmayr Original Multicolor (100% Cotton; 98 yards [90 meters]/50 grams); color #85 Jade Mix – two skeins

Needles: Straight needles in size 7, cable needle (cn) or double-pointed needle for cabling

Notions: Tapestry needle, stitch marker 


Gauge: 20 stitches = 4 inches

So let's get started! First, let's define some terminology as follows:


front cross (fc): slip 2 stitches to cn and hold in front, p3, k2 from cn

back cross (bc): slip 3 stitches to cn and hold in back, k2, p3 from cn

Now, cast on 14 stitches loosely, and knit the following row: p2, place marker, k4, p4, k4. Then, we’ll repeat a few set-up rows to get the piece started. Or in our pattern notation,

Set-up Rows 1 & 3 (right side): p4, k4, p4, slip marker, knit until one stitch before end of row, yo, k1

Set-up Rows 2 & 4: purl until marker, slip marker, k4, p4, k4 


Friday, February 28, 2014

Lucina Shell Cowl

Lucina Shell Cowl

In my experience, at least half of making a nice pattern is finding the right blend of yarn and design. And with these particular yarns - the grey one is textured, and the yellow one is glossy smooth - I wasn't quite sure if I could pull off a mixed design. But then I found this gathered stitch pattern, which adds stitches on rows 1, 3, and 5 and then pulls them all together in row 7, and I thought that it was just the right combination of whimsy and texture to make the yarn pop.

The pattern. Well, I didn't do a very good job of
straightening it out but I think you get the point...
Yarn: Bristol Yarn Gallery Bradford (97% Pima Cotton, 3% Nylon; 120 yards [110 meters]/50 grams); #112 Mirage (color A) - one skein & Bristol Yarn Gallery Somerset (85% Pima Cotton, 15% Silk; 115 yards [105 meters]/50 grams); #103 Yellow (color B) - one skein

Needles: One 24" circular needle in size 7

Notions: Tapestry needle, three stitch markers or scraps of yarn to mark stitches

Gauge: 18 stitches = 4 inches

Using color A, cast on 130 stitches, place marker, and join in round. Purl 14, place extra marker, and then purl until you have 14 stitches left in round, and place another marker. Purl till the end of the round. And now, let's begin the main pattern, which is Lucina Shell from page 226 of Barbara G. Walker's A Second Treasury of Knitting Patterns, except adapted for the round and stripes (and blended with a slipped stitch pattern). So here goes!

Tuesday, February 25, 2014

American Beauty Hat

American Beauty Hat

It may be spring in most of the country, but in my neck of the woods, we're still in single-digits, driving down roads rutted with ice. Of course, I think that this three-color, slipped stitch hat will transition nicely to warmer temperatures as well, and hopefully now that I've made it for my husband, that's exactly what we'll get. Or at least his ears will stay warm...

Yarn: Schachenmayr smc Juvel (100% New Wool; 116 yards [106 meters]/50 grams); #575 Light Moss - one skein (color A), #2 Medium Grey Heather - one skein (color B), #500 Mottled Bark - one skein (color C)
I couldn't bring myself to do a boring back -
hit me up if you want one, though, and I'll come up
with something.

Needles: One 16" circular needle in size 4, one 16" circular needle in size 7

Notions: Tapestry needle, stitch marker

Gauge: 22 stitches = 4 inches on size 6 needles

Using your size 4 circular needle and your color A yarn, cast on 116 stitches, place marker, and join in round. Knit 1.5" in a * k1, p1 * ribbing, and then switch to your size 7 needle and knit one row. Next, we'll begin the pattern, which is American Beauty Tweed from page 39 of Barbara G. Walker's A Second Treasury of Knitting Patterns, except adapted for the round. So here goes!

Row 1: using color B, * slip 2 with yarn in back, k2; rep from *

Saturday, February 22, 2014

Cloverleaf Eyelet Fingerless Gloves

Cloverleaf Eyelet Fingerless Gloves

I recently received a lovely email suggesting that I make a pair of lacy, fingerless gloves. And I was immediately on board - I've been plotting fingerless gloves for a while now, other projects just keep getting in the way. Unfortunately, I didn't have any good yarn for a particularly lacy project, so I ended up with these kind of starter-lace gloves instead, which use a little bit of eyeletted ribbing, but are a fairly straightforward pattern. Now that I've patterned my first pair, however, expect to see more in the near future - and of a lacier variety!

The pattern. A cloverleaf, if you look closely.
Sizes: smaller (for a hand roughly 7 1/2" - 8" in circumference at the base of the thumb) and larger (for a hand roughly 8 1/2" - 9" in circumference at the base of the thumb) - directions for larger size will follow those for the smaller size in parentheses

Yarn: Cascade 220 Superwash (100% Superwash Wool; 220 yards [200 meters]/100 grams); #821 Daffodil – one skein (both sizes)

Needles: one set of double-pointed needles in size 6, one set of double-pointed needles in size 4

Notions: Tapestry needle

Gauge: 22 stitches = 4 inches on size 6 needles

First and foremost: since these fingerless gloves have a pattern that's intended to be in different places on the two gloves (left of the thumb on the left side, right of the thumb on the right), we'll have to knit the right and left gloves with slightly different patterns. So let's begin with the left, and when that bad boy's done, we'll move on to the right!

Thursday, February 20, 2014

Porcelain Moon Cowl

Porcelain Moon Cowl

Okay, I know the name for this one is goofy. But the design reminds me of something between fine china and Sailor Moon, and I don't have a name for the stitch, so I got stuck. And, either way, it's a closer-fitting, quick-knitting cowl that gets a bit of a different look from the faux-bow gather of the front.

Yarn: Classic Elite Yarns Solstice (70% Organic Cotton, 30% Wool; 100 yards [91 meters]/50 grams); #2346 Faded Teal – one skein (color A) & Skacel Urban Silk (80% Silk, 20% Cotton; 93 yards [85 meters]/50 grams); #01 Cream – one skein (color B)

Needles: One 16" or 20" circular needle in size 8

Notions: Tapestry needle, 3 stitch markers

Gauge: 18 stitches = 4 inches (roughly - my two skeins are slightly different gauges, but I'm not worrying about it)

Using color A, cast on 117 stitches, place marker, and join in round. Next, purl 9, place marker, and purl until you're 9 stitches from the end of the round. Place a second marker, and purl until you reach the end of the round. Purl two more rows, slipping additional markers when you come to them. And now, it's time to begin the pattern, which goes as follows:

Row 1: using color A, knit until two stitches before first marker, k2tog, slip marker, and knit until second marker. Then, slip marker, ssk, and knit til end of round

Tuesday, February 18, 2014

Flemish Block Cowl

Flemish Block Cowl

As soon as I saw this yarn, I was in love. After all, it's ridiculously soft, delightful to knit, and a pretty pink color to boot (well, my four-year-old says it's "too pink", but he also thinks racquetball is called "rocketball," so I'm not giving him too much credit). Anyway, the challenge I had after buying this yarn was finding a decent way to knit it up. And after rejecting not one, but TWO two-color designs and ripping out false starts at least four times, I came up with this voluminous and luxuriously soft spring knit, that could also be made a few inches shorter if you wanted something with a little less bulk around the neck. But let's get on to the pattern, eh?

The Flemish Blocks
Yarn: Cascade Yarns Pure Alpaca (100% Baby Alpaca; 220 yards [200 meters]/100 grams); #3055 Strawberries & Cream – one skein 

Needles: One 24" circular needle in size US 7

Notions: Tapestry needle, 3 stitch markers

Gauge: 20 stitches = 4 inches

Cast on 119 stitches, place marker, and join in round. Then, knit one row in a * k1, p1 * pattern, placing one marker after you've worked 37 stitches, and the next marker 45 stitches later (so this marker should be 37 stitches from the end of the round) (and yes, since you're knitting a * k1, p1 * pattern, you will have two knit stitches together on either side of the round marker, since we have an odd number of stitches). Purl one row, and then complete another * k1, p1 * row like the first, slipping extra markers when you come to them on both rows. Then we'll go straight to the pattern, which is a combination of Flemish Block Lace from page 270 of Barbara G. Walker's A Second Treasury of Knitting Patterns and a simple lace pattern. So let's get started!

Saturday, February 15, 2014

Stripe and Spot Cowl

Stripe and Spot Cowl

At some point, I think I made an unconscious decision to knit something for everyone who works at my kids' preschool. And this particular piece is intended for a certain Miss Mary, who requested something a little bit warm and a little bit fun. So here's what I came up with - a nice weight for our frosty spring!

Yarn: Patons Classic Wool Worsted (100% Pure New Wool; 210 yards [192 meters]/100 grams); #202 Aran – one skein (color A), Cascade 220 Superwash (100% Superwash Wool; 220 yards [200 meters]/100 grams) #1942 Mint - one skein (color B), and #1960 Pacific - one skein (color C)

Needles: One 24" circular needle in size 7

Notions: Tapestry needle, 3 stitch markers

Gauge: 20 stitches = 4 inches

Using color A, cast on 120 stitches, place marker, and join in round. Knit one row in a * k1, p1 * pattern, placing one extra marker after working 57 stitches, and another extra marker 5 stitches away from that (so the first marker should be 57 stitches from the beginning of the round and the second marker should be 58 stitches from the end of the round). On your next row, use a * p1, k1 * pattern, slipping extra markers when you reach them, and then knit one more row like your first, also slipping the markers (so you'll have three rows of seed stitch). Then we'll switch to our pattern, which is a total bastardization of Stripe and Spot Pattern from page 56 of Barbara G. Walker's A Treasury of Knitting Patterns.

Wednesday, February 12, 2014

Kids' Dice Check Balaclava

Kids' Dice Check Balaclava

So I'll be honest; I'm not sure I would have ever come up with the idea to knit a kids' balaclava on my own. But after a special request for a simple but attractive kids' piece, I came up with this design. And while it's not quite as "simple" as I originally intended, I do think that the three-color pattern I've come up with is striking, and easier to make than it looks, since the most complex thing you'll need to know how to do to make it is pick up stitches. However, as this pattern has more instructions than many of the ones I post, I highly recommend reading through it before you begin, so you know where you're going.

Sizes: Ages 18 months - 3 years (4 - 7 years)
The top. With racing stripe.

Yarn: Cascade 220 Superwash (100% Superwash Wool; 220 yards [200 meters]/100 grams); #1924 Midnight Heather – one skein (color A), #1942 Mint - one skein (color B), and #821 Daffodil - one skein (color C) (all sizes)

Needles: Two circular needles in size 6, one of them 16", and one of them 24" or longer; another 16" circular needle in size 5

Notions: Tapestry needle, 3 stitch markers, stitch holder

Gauge: 22 stitches = 4 inches in stockinette on size 6 needles

Before we get to the pattern, let me outline how the thing is constructed. First, then, we'll knit a strip which will end up being the top of the head, and then we'll pick up stitches along both sides of the strip, to create the sides and back of the hood. Next, once we've knit the entire head-covering part, we'll join the thing in a round and knit the neck portion. Lastly, we'll pick up stitches around the face hole to create a ribbing. And now that we know where we're going with this thing, let's get started!

Sunday, February 9, 2014

Honeycomb Legwarmers

Honeycomb Legwarmers

So I'm going to be honest, here; the main reason I knit these legwarmers in these yarns is because I had no idea what else to do with them. The accent yarn is a chunky acrylic-based variegated, which has not only a color change, but is also always two colors at any given time. And the main color yarn is mostly-white, but has occasional flecks of black. Long story short, I was worried that knitting either of them up plain would swallow the pattern. And, while I may be delusional, I think that the slipped stitch, ribbing pattern I've developed here shows off both yarns, while also creating a warm, lofty ribbing that's well suited to a legwarmer.
I even made two!

Sizes: I recommend sizing these close to the biggest part of your calf (it's your choice whether you'd like them to turn out tighter or looser). Therefore, I will give sizing instructions for a calf of roughly 12" (14", 16"), and you can scale up or down by roughly 2" by casting on more or less stitches in sets of 9. You can also change your needle gauge for more incremental variations in size.

Yarn: Lana Gatto Bon Bon (56% Wool, 24% Acrylic, 20% Nylon; 126 yards [115 meters]/50 grams); #5589 White Grey - 2 skeins (color A) & Schachenmayr Original Boston Style (42% Acrylic, 39% Polyester, 19% Wool; 66 yards [60 meters]/50 grams); #599 Black - 2 skeins (color B)

Needles: One set of double-pointed needles (dpns) in size 10.5

Notions: Tapestry needle

Gauge: 15 stitches = 4 inches