Showing posts with label sock. Show all posts

Friday, April 11, 2014

Staghorn Fingerless Gloves

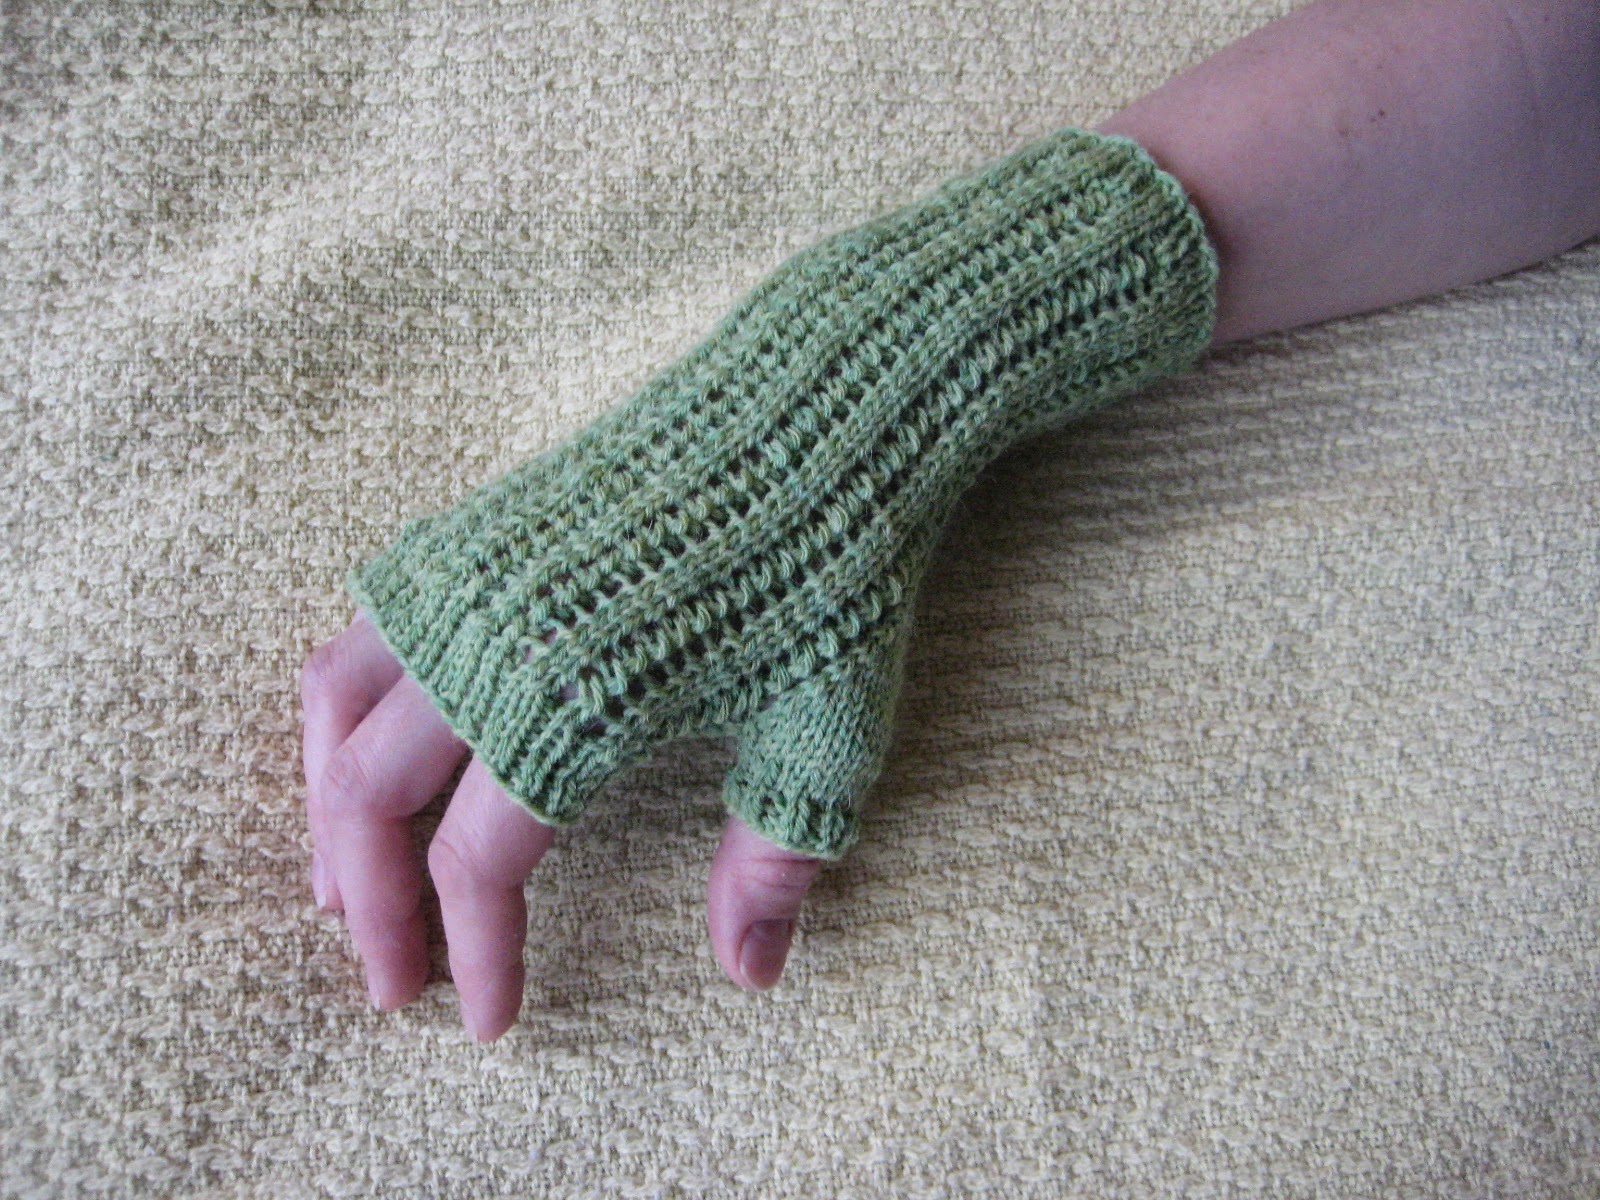
Staghorn Fingerless Gloves, with tweeting bird, to complete the natural vibe

Well, I'm still picking away at the same skein of yarn that I used for the Razor Shell Fingerless Gloves, and I'm still digging the results (and amazingly, even after finishing these bad boys, I think I'm still going to be able to put together a two-color cowl with the rest of my single skein). Anyway, this pair of fingerless gloves uses a basic stockinette and a pretty cable to create a bit of interest in the thumbs. And it's still such a lover-ly green!

Just one hand.
It looks lonely, doesn't it?
Sizes: smaller (for a hand roughly 7 1/2" - 8" in circumference at the base of the thumb) and larger (for a hand roughly 8 1/2" - 9" in circumference at the base of the thumb) - directions for larger size will follow those for the smaller size in parentheses

Yarn: Berroco Ultra Alpaca Fine (50% Superwash Wool, 20% Super Fine Alpaca, 30% Nylon; 433 yards [400 meters]/100 grams); #12177 Kaffir Mix - one skein

Needles: One set of double pointed needles (dpns) in size 2, one set of dpns in size 1, cable needle (cn)

Notions: Tapestry needle

Gauge: 30 stitches = 4 inches

Using your size 1 needles, cast on 56 (66) stitches loosely, and distribute between your three double pointed needles as follows: 20 stitches on your first needle, 16 stitches on your second needle, and 20 stitches on your third needle (for larger size: 20 stitches on you first needle, 26 stitches on your second needle, and 20 stitches on your third needle). Join in round. Then, we'll knit the following ribbing row:

Ribbing Row: * k1, p1 *

Friday, April 4, 2014

Razor Shell Fingerless Gloves

Razor Shell Fingerless Gloves

I've worked with this yarn before, and enjoyed it (with the Lady Lawyer Arm Warmers and the Oopsie Daisy Diagonal Hat). Therefore, when I saw it in this delicious brand-new-leaf green, I knew I had to bring it home. And the Razor Shell Fingerless Gloves have a nice open pattern that's great for spring, with the added benefit that the yarn overs give them a ribbing-like quality which makes them conform nicely to the hands. So, you know, the yarn is nice, the shape is good, and the pattern looks decent, to boot. And what more can you look for in a fingerless glove?

My husband calls this pose the "claw."
Apparently, I don't have a future in hand modeling.
Sizes: smaller (for a hand roughly 7 1/2" - 8" in circumference at the base of the thumb) and larger (for a hand roughly 8 1/2" - 9" in circumference at the base of the thumb) - directions for larger size will follow those for the smaller size in parentheses

Yarn: Berroco Ultra Alpaca Fine (50% Superwash Wool, 20% Super Fine Alpaca, 30% Nylon; 433 yards [400 meters]/100 grams); #12177 Kaffir Mix - one skein

Needles: One set of double pointed needles (dpns) in size 2, one set of dpns in size 1

Notions: Tapestry needle

Gauge: 30 stitches = 4 inches

Using your size 1 needles, cast on 55 (65) stitches loosely, and distribute between your three double pointed needles as follows: 20 stitches on your first needle, 15 stitches on your second needle, and 20 stitches on your third needle (for larger size: 20 stitches on your first needle, 25 stitches on your second needle, and 20 stitches on your third needle). Join in round. Then, we'll knit the following ribbing row:

Monday, January 20, 2014

Starry Night Cowl

Starry Night Cowl

I fell in love with this yarn as soon as I touched it; the bamboo and superwash wool give it a very nice feel, and it knits up really nicely, giving the finished fabric a beautiful drape. And as far as my design goes, I started with a cables and lace pattern and then dropped the cables towards the top, so it would drape more gently around the neck. Ultimately, I'm sure a solid color would show off the pattern better than this variegated one does, but this delicate cowl still feels super-good on.
The shoulder. Here, you can see the transition
of the cable into the "starry night" eyelets
above it.

Yarn: Crystal Palace Yarns Panda Superwash (51% Bamboo, 39% Superwash Wool, 10% Nylon; 186 yards [172 meters]/50 grams); #2004 Mint Print - 2 skeins

Needles: One 24" circular needle in size 2, cable needle (cn) or double pointed needle (dpn) for cabling

Notions: Tapestry needle and 3 stitch markers, or scraps of yarn to mark your stitches (this is probably the better option, given the gauge)

Gauge: 31 stitches = 4 inches in stockinette

So let's get started! First, cast on 248 stitches loosely, place marker or yarn scrap, and join in round. Then, knit 24, place another marker, and knit until you have 24 stitches left in your row and place another. Finish the row knitting. And before we get started on the main pattern, let's complete the following rows:

Row 1: purl, slipping extra markers when you come to them

Row 2: knit, slipping extra markers when you come to them

Saturday, November 16, 2013

Zigzag Cowl

Zigzag Cowl

Okay, last year I knit my mother a cowl out of a different color of this same yarn, and I was very impressed by its airy texture and attractive folding. So when I saw another color, especially one with such nice earth tones, I had to get it and try again. This particular cowl is really dang wide (roughly 15" - which makes it layer so nicely), and this variegated yarn suits it perfectly, creating delicate and even stripes. I chose to knit it on the shorter side so that it would sit close to the neck and keep a person warm, but with a few more inches of length it would suit warmer temperatures as well. And it's just so pretty!

The pattern
Yarn: Berroco Comfort Sock (50% Super Fine Nylon, 50% Super Fine Acrylic; 447 yards [412 meters]/100 grams); #1814 Dunedin - one skein

Needles: One set of straight needles in size 3 (fine, I knit it on a 16" circular needle, but that's because I can't stand straights. It's a back-and-forth knit either way)

Notions: Tapestry needle

Gauge: 30 stitches = 4 inches in stockinette

Cast on 80 stitches (you can cast on less, as long as you cast on an even number, if you don't want your piece to be quite as wide. you will lose volume, however). And now, let's begin the pattern, which is Zigzag Lace Trellis from page 190 of Barbara G. Walker's A Treasury of Knitting Patterns.

Row 1 (wrong side) & all other odd rows: purl

Rows 2, 4, and 6: k1, * yo, k2tog; rep from *, end k1

Rows 8, 10, and 12: k1, * ssk, yo *, end k1

Saturday, August 10, 2013

Sunburst Cowl

Sunburst Cowl

If you've poked around my blog at all, you already probably know that I love a good cowl (so efficient! harder for the kids to tug on! never has ends that could dangle in a toilet!, etc). And this is another design, made with sock yarn since that's what I've got hanging around. It's also easy to style in a couple of different shapes, and has a nice, lightweight appearance overall. Well, and yours doesn't have to be yellow...

Oh, and before we get started, I highly recommend you read through the pattern before beginning, just so you know how many repeats of different stitch sets we'll be doing!

Yarn: ShibuiKnits Sock (100% Superwash Merino; 191 yards [175 meters]/50 grams); #1900 Bright Canary Yellow - one skein

Needles: one 24" circular needle in size 4
The ol' pattern close-up.  Notice the holes.

Notions: tapestry needle, three stitch markers or scraps of yarn to mark stitches

Gauge: 26 stitches = 4 inches

To get started, we're going to cast on 198 stitches, place marker, and join in a round. Next, we're going to place the other two markers like so - k30, place another marker, p138, place another marker, and knit to beginning of row (30 stitches).

And now it's time to knit exactly ONE repeat of the main pattern, which goes as follows (we'll return to it later in the piece, although we're gonna do some short rows before we get back to it):

Row 1: p30, slip marker, * k2tog, yo, k1; rep from * until you reach the next marker, slip marker, p30

Rows 2 & 4: k30, slip marker, *k1, p1, k1 * until next marker, slip marker, k30

Row 3: p30, slip marker, * k1, yo, k2tog * until you reach the next marker, slip marker, p30

Saturday, July 6, 2013

Dimpled Eyelet Hat

Dimpled Eyelet Hat

Okay, so here's the deal.  I made the Dimpled Eyelet Cowl and really liked the tiny section of the pattern that wasn't fully eyeleted (which came as a result of the circular knitting and such).  I've also had this sock yarn kicking around my stash for years now, and this seemed like a perfect opportunity to use it.  Of course, as soon as I started making it, my four-year-old claimed it as his, which is why he insisted on being in many of the photos.  Even better, due to his enormous head and the hat's natural slouchiness, it fits everyone from a four-year-old to an adult!

Yarn: ShibuiKnits Sock (100% Superwash Merino; 191 yards [175 meters]/50 grams); #51305 Zinnea - one skein, but I got WICKED close to the end on this one, so you will probably want slightly more yarn, or two skeins just in case

Needles: One 16" circular needle in size 3, one set of double-pointed needles (dpns), also in size 3
A close-up of the pattern

Notions: one stitch marker or scrap of yarn, tapestry needle

Gauge: 28 stitches = 4 inches

Cast on 160 stitches, place marker, and join in round.  Next, knit one inch in the following ribbing pattern:

Ribbing pattern: * k1, p2, k1; repeat from *

And now it's time to switch to the main pattern, which goes as follows:

Row 1: * k2tog, (yo) twice, ssk *

Row 2: knit all stitches except double yo's, where you will p1 in first yo, and k1 in back loop of second yo

Rows 3 & 4: knit

Saturday, May 4, 2013

Oopsie Daisy Diagonal Hat

Oopsie Daisy Diagonal Hat

Okay, so before we get any further - pretty much the only reason I made this hat was to see if I could make both the hat and the Lady Lawyer Arm Warmers with one skein of yarn.  And guess what?  It totally worked, and my children are rejoicing as we speak (that's a lie.  they're actually just yelling at me).  And besides that - well, the reason I called it the "Oopsie Daisy Diagonal Hat" was because the stitch pattern was a total accident, a cock-up if you will, since I meant to do something else.  By the time I realized it wasn't working out, though, I was too far along to care.  And I ended up liking the textured diagonals anyway, so it all worked out.  Especially the whole one-skein business.  So let's get to it

Yarn: Berroco Ultra Alpaca Fine (50% Peruvian wool, 20% Super Fine Alpaca, 30% Nylon; 433 yards [400 meters]/100 grams); #12171 Berry Pie Mix - one skein

Needles: One 16" circular needle in size 3, one set of double pointed needles (dpns), also in size 3
Close-up of the accidental pattern

Notions: Tapestry needle, stitch marker or scrap yarn

Gauge: 30 stitches = 4 inches in stockinette on size 2 needles

Using circular needle, cast on 154 stitches, place marker or scrap yarn, and join in round.  Knit 1 inch in k1, p1 ribbing.

Now it's time to begin the main pattern.  Here goes!

Row 1: * k1, yo, ssk, yo, sl1-k2tog-psso, yo, k1; rep from *

Monday, April 29, 2013

Lady Lawyer Arm Warmers

Lady Lawyer Arm Warmers
Okay!  So much like the last hat I posted, these arm warmers are for a friend, by request.  And as you've probably guessed by now, she's a lady lawyer in Alaska, where the courtrooms are cold but the justice is hot (or so they say).  Either way, she wanted something delicate and eggplant-y, and I loved this stitch pattern too much to use any other (none of the pictures show it really well, but the basic pattern is a big hole in the center of a four-stitch rib, and then two little holes on the side two rows up, repeated over and over).  Or in other words, it's perfect for all your Alaskan justice-related needs.

Yarn: Berroco Ultra Alpaca Fine (50% Peruvian wool, 20% Super Fine Alpaca, 30% Nylon; 433 yards [400 meters]/100 grams); #12171 Berry Pie Mix - one skein

Needles: One set of double-pointed needles (dpns) in size 1

Notions: Tapestry needle
A little bit better view of the pattern, with a twist

Gauge: 30 stitches = 4 inches in stockinette on size 2 needles

Now, before we get started, let's talk about sizing for a moment.  To make these arm warmers, I cast on 72 stitches, and they're intended for a person whose forearms and base-of-thumb hand-parts measure roughly 9.5" around.  Each iteration of the pattern is 6 stitches and little under 1"; for that reason, you can change the size of these arm warmers by simply casting on more or less stitches.  If your forearms are smaller than 9.5" you can comfortably wear larger arm warmers, but they won't stretch and show the pattern off as well.  So if your forearms/base-of-thumb-hand-parts measure about 8.5", consider casting on 66 stitches, cast on 60 stitches if they measure 7.5", and even less if you're making these for a child (and conversely, cast on 78, 84, etc. stitches if your forearms and hands are larger).  Luckily, this is only something you have to think about once, when you do your initial cast-on!  So let's get started.