Wednesday, October 19, 2016

Swiss Check Scarf

Swiss Check Scarf

If I had one inspiration for this scarf, it was the planned color pooling pictures that keep popping up in my Facebook feed (dude, I follow a lot of knitters). If I had two inspirations for this scarf, it was PCP (such a bad acronym!) and laziness; the idea of fiddling with a yarn and a design until I had nailed a certain color pattern seemed about as appealing to me as taking all three of my children to the dentist by myself for concurrent appointments. So I went with a more relaxed take on the same theme; namely, a slip stitch color pattern worked with two skeins of the same variegated yarn that still creates a fancy pattern but requires much less precision! :)

Yarn: Lang Yarns Viva (100% Merino Wool; 120 yards [110 meters]/50 grams); #0020 - four skeins

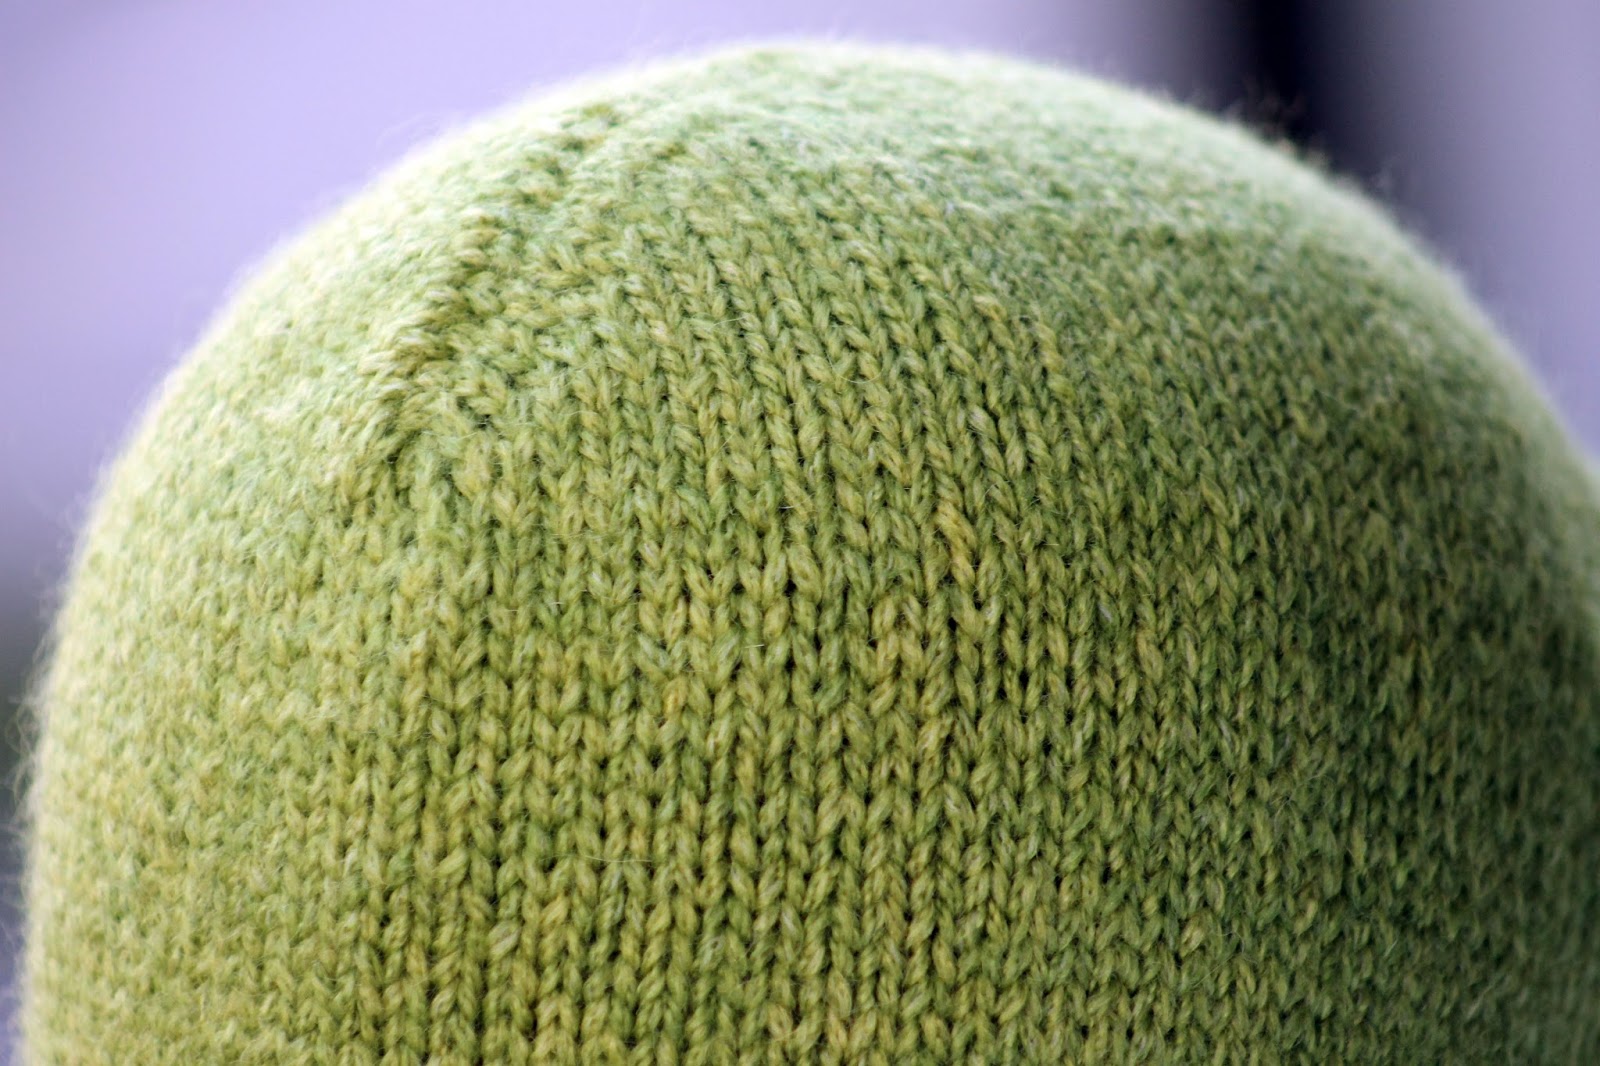
A closer look at the Swiss Check.
So Swiss, no?
Needles: One pair of straight needles in size US 8

Notions: Tapestry needle

Gauge: 19 stitches = 4 inches in stockinette

And now that we've gotten the basics down, let's make a scarf! And let's begin by talking some shop: specifically, addressing the fact that this scarf is worked with two skeins of your variegated yarn at once, and that even though they're the SAME DARN COLOR (or combination of colors I suppose), I will be calling one skein A and one skein B. Of course, that's because they need to be worked alternately in order to produce the slip stitch color pattern (and for that reason I also recommend that you make sure to begin the slip stitch pattern with a portion of your skein B ball that does not match your skein A ball at whichever point in the dye you're in after the edging rows). So let's proceed as follows:

Using your skein A yarn (aka any whichever one of your skeins you pick up first), cast on 39 stitches loosely and work the edging rows as follows:

Wednesday, October 5, 2016

True Blue Shawlette

True Blue Shawlette
True Blue Shawlette

On most occasions, I try to keep my knitting fairly seasonal (or representative of the months to come). I'm sure that's why I bought this yarn and started this shawlette months ago, only to get hung up by my uncooperative forearms. Now that I've finally finished the piece, though, we should all just pretend it's summer again, and that the cold breeze I felt this afternoon was actually as balmy as July's winds. Or not, in which case you can file this pattern away for next year, when you've got 300+ yards of a cotton-, silk-, linen-, or bamboo-based fiber and a hankering for a short shawl (or even a big one, if you want to keep working and you've got enough yarn!).

Yarn: Lana Grossa 365 Cotone (88% Cotton, 12% Polyamide; 153 yards [150 meters]/50 grams); #026 Türkisgrün - two skeins

True Blue Shawlette
A better look at the pattern.
Basically, just lace and garter stitch!
Needles: One 32" or longer circular needle in size US 7

Notions: Tapestry needle

Gauge: 20 stitches = 4 inches in stockinette

So let's make a little shawl thing! And in case I wasn't clear enough before, this pattern is good for those occasions when you're not sure if you've got enough yarn or not; since it's designed from the rounded bottom up, it's completely scalable in size - make it small if you've only got 300 yards, or bigger with more. No matter how much yarn you've got, however, you'll begin by casting on 3 stitches loosely, and then working 8 rows in garter stitch to create a tab of sorts. Then, without turning work, yarn over (yo) twice, pick up 1 stitch about 1/3rd of the way down along the edge of the tab, (yo) twice again, pick up 1 stitch roughly 2/3rds of the way down the edge of the tab, and (yo) twice again. Complete tab by picking up 3 stitches along cast-on edge; you should now have stitches coming from 3 sides of the tab - 3 along original working edge - 8 along the side (counting each double yo as 2 stitches), and 3 along the cast-on edge. Then, work a few set-up rows as follows:

Wednesday, September 21, 2016

Ruched Mitts

Ruched Mitts
Ruched Mitts

I'm not exactly sure where to start with these guys, mostly because I don't actually want to start. After all, if I begin this post, I'm going to have to explain that my recent absence was due to repetitive stress issues with my forearms, that I'm doing much better now, thank you very much, and that I will probably be relaxing my regular posting schedule so that I can continue to do well.

And heck, since I don't want to go through all that, let's not - let's talk about these mitts instead! And the first thing I should mention in that realm is that I bought this yarn because I thought it would make an easy project - it's bulky weight, for goodness sake, and not even variegated! Unfortunately, I was wrong since it turns out that this particular fiber is one of those strong core/big halo types (you know what I mean, right? - there's a thick center and then lots of fuzz?). And those types of yarn are very pattern resistant, since lace knitting isn't well-defined in them and even cables look messy. Which is how I finally stumbled across the ruched design, which uses some well-placed eyelets and a scrap yarn i-cord to create some interest. So let's get started!

Sizes: small (medium; large) (the small will fit a hand roughly 7.5" - 8.5" in circumference at the base of the thumb, the medium up to 9.5", and the large goes up to about 10.5")

Yarn: Schachenmayr Fashion Nordic Dream (57% Viscose, 35% Wool, 8% Polyamide; 164 yards [150 meters]/50 grams); #00002 Natur Mélange - one skein (color A) & Malabrigo Worsted (100% Merino Wool; 210 yards [192 meters]/100 grams); #12 Very Berry – roughly 20 yards (color B)

Ruched Mitts
A better look at the ruching.
My five-year-old likes it.
Needles: One set of double pointed needles (dpns) in size US 8

Notions: Tapestry needle

Gauge: 16 stitches = 4 inches

Which brings us to the mitts! To begin, then, using your color A yarn, cast on 28 (32; 36) stitches loosely and distribute between 3 dpns as follows: 8 stitches on first needle, 12 stitches second needle, 8 stitches on third needle [(10; 12; 10); (12; 12; 12)]. Join in round. Then we'll move straight to our main pattern, as follows:

Rows 1 - 6: knit

Row 7: knit across first needle; k2, [k2tog, (yo) twice, ssk] twice, k2 from second needle; knit across third

Row 8: knit, working a (k1, p1) into each double yo 

Wednesday, August 24, 2016

Magentalicious Cowl

Magentalicious Cowl
Magentalicious Cowl

First of all, I don't want to hear anything about my unimaginative name this week - I cycled through at least 847 other options that were significantly worse (including the "Better Than Barney" - named, of course, after the purple dinosaur. Really, I was scraping the bottom of the barrel). So since we're not going to talk about the name, let's just talk about the design, which is incredibly quick-knitting in a super bulky fiber, but still has a little bit of added pizazz with a single dropped stitch design. Oh, and it's also narrower at the back of the neck, so it tucks easily under a jacket.

Yarn: Lang Yarns Malou (70% Alpaca, 20% Nylon, 10% Wool; 71 yards [65 meters]/50 grams); #0166 Magenta - two skeins

Magentalicious Cowl
I forgot to take a super close-up
but here's more detail of the
dropped stitch design.
Needles: Straight needles in size US 15

Notions: Tapestry needle

Gauge: 10 stitches = 4 inches in stockinette

So let's start by casting on 18 stitches provisionally (I didn't call for a larger needle size for the provisional cast-on because the gauge is already big enough that you may not have larger needles laying around. But remember that you're going to want your provisional stitches to be big enough to get your needle through them when you pick them back up!). Anyway, once that's done we'll knit some set-up rows, as follows. Remember that your 3 slipped stitches are creating a faux i-cord edging so you can pull 'em as tight as you like!

Set-up Row 1 (right side): slip 3 stitches with yarn in back (sl3 wyib), k12, sl3 wyib

Set-up Row 2: purl

Wednesday, August 17, 2016

Friend of the Forest Hood

Friend of the Forest Hood
Size Medium

This particular design represents a perfect confluence of events; first, I got a request for a hooded cowl with a rounded crown, and then I found this rather spectacular alpaca yarn in the sale bin at my local yarn shop and knew that it would be perfect for the job. And if that isn't delightful enough, I also played a harrowing game of yarn chicken and managed to finish this medium size hood with just two skeins of the yarn. As you'll notice, however, I recommend a bit extra if you're making this size - unless, of course, you like to live as dangerously as I do. ;)

Sizes: Small (Medium; Large) (Small is perfect for toddlers & young children; medium for large children, teens, and small adults; large for large adults or simply a fuller-fitting hood)

Yarn: Lana Grossa Alta Moda Alpaca (90% Alpaca, 5% Virgin Wool, 5% Polyamide; 153 yards [140 meters]/50 grams); #035 Lime Sherbet - 2 skeins (3 skeins; 3 skeins)

A better look at the back finish.
Short rows give it a nice rounded seam.
Needles: one 16" circular needle in size US 9, one set of double pointed needles (dpns) in size US 9 for three needle bind off (you can also use regular straight needles and your circular needle for your third)

Notions: Tapestry needle, stitch marker

Gauge: 18 stitches = 4 inches in stockinette

So let's make a hood thingy thing! And let's start by casting on 96 (108; 120) stitches loosely, placing marker, and joining it in the round. Next, purl four rows around as edging. And once that's done, knit until knit section measures roughly 4" (4.5"; 5"). Then we'll work a few transition rows, as follows:

Wednesday, August 10, 2016

Ridge and Furrow Cowl

Ridge and Furrow Cowl

You know how you can walk by the same spot a million times and still not notice what's there? That's exactly what I realized had happened to me when I discovered another local yarn shop, this one just a four minute bus ride from my house. And if that discovery weren't great enough on its own, I discovered that said local yarn shop ALSO has a lovely sale section, which facilitated the pattern for this 100% silk cowl that's both basic and fun (not to say that sale yarn -- or even silk yarn -- is required for your own).

Yarn: Lana Grossa Linea Pura Soloseta (100% Silk; 109 yards [100 meters]/50 grams); #001 Light Gray Mix - 2 skeins

Ridge and Furrow Cowl
Another look at the pattern.
It reminds me of a field!
Needles: One 24" circular needle in size US 8

Notions: Tapestry needle, stitch marker

Gauge: 19 stitches = 4 inches in stockinette on size US 8 needles

And with that out of the way, let's make a cowl! First, then, cast on 110 stitches loosely, place marker, and join in round. Then we'll move straight to the pattern, which is a basic combination of seed stitch and a yo/decrease combination, and goes like so:

Row 1: * p1, (k1, p1) three times, k3; rep from *

Wednesday, August 3, 2016

Little Check Market Bag

Little Check Market Bag

If you follow me on Instagram then you probably know why this post has been so long in the making: we've been traveling, and anyone who's able to travel with small children and also knit is far more talented than I (it doesn't help that my little one is the Houdini of hotel rooms). Luckily, I left this little beauty blocking while I was gone, so I had at least one nice thing to come home to. Speaking of the bag, I should also mention that it follows my standard rules of knitted bags, since it's both functional (faux i-cords in the body and the handles help to prevent stretching) and fun (imagine it with even more colors!). And heck, maybe it's even functional and fun enough to use on my next trip... :)

Yarn: Lang Yarns Presto (50% Cotton, 50% Acrylic; 71 yards [65 meters]/50 grams); #911.0074 - 3 skeins (color A - the blueish one), 911.0001 - 1 skein (color B, the white), & #911.0002 - 1 skein (color C, the tan)

A closer look at the stitch pattern and the handle.
Needles: One set of double pointed needles (dpns) in size US 7, one 16" or 24" circular needle, also in size US 7, one 16" or 24" circular needle in size US 6, and one needle in size US 8 for provisional cast on (optional)

Notions: Tapestry needle, stitch marker

Gauge: 17 stitches = 4 inches in stockinette (20 stitches = 4 inches in pattern)

And now that that's covered, let's make a bag! We'll begin with the handles. I should tell you that you have two options at this point, as well: later on, when you finish the bag, you can either attach the handles by seaming normally, or with a three needle bind off. For both, you'll use your color A yarn. If you'd like to go the seaming route, then, using your size 7 needles, cast on 12 stitches loosely. If you'd like to use the three needle bind off at the end, using your size 8 needle, cast on 12 stitches provisionally, and then transfer work to your size 7 needles (this is also why the size US 8 needle is optional!). 

Wednesday, July 13, 2016

Lollipop Beanie

Lollipop Beanie

The story behind this hat is mostly just a story about the yarn; I first spotted this perfect color in my local yarn store back in Madison, and, though I wanted to buy it about 1,000,000 times, I never did. Why? Well, because I have a tendency to psych myself out when trying to design with yarns I really love, and I never quite figured out exactly what I'd do with the skein. Then, of course, I moved to Switzerland, where I can no longer buy Malabrigo at my local yarn store, and I finally had to face the facts. I missed the brand, and wanted this exact skein. So I ordered the fiber online just a few weeks ago, and, this time, I knew exactly what I'd do with it as soon as I touched the stuff. Specifically, I decided to make a hat that looks good enough to eat, aka the Lollipop!

Yarn: Malabrigo Worsted (100% Merino Wool; 210 yards [192 meters]/100 grams); #12 Very Berry – one skein

A better look at the cables.
They're lollipop-esque, no?
Needles: one 16" circular needle in size US 8, one 16" circular needle in size US 9, one set of double pointed needles (dpns), also in size 9, and one cable needle (cn)

Notions: Tapestry needle, stitch marker

Gauge: 16 stitches = 4 inches on size US 9 needles in stockinette

So let's make a hat then! Using your size US 8 needles, cast on 80 stitches loosely, place marker, and join in round. Then we'll work the ribbing as follows:

Ribbing Row: * k1, p1; rep from * 

Knit this ribbing row until piece measures roughly 2". Transfer work to your size US 9 circular needle, and then we'll knit one transition row, as follows:

Wednesday, July 6, 2016

Rib & Braid Headband

Rib & Braid Headband

I wish I had a cool origin story for this headband, but the truth of the matter is that I was in the mood for a small project and I wanted to use my leftover yarn (the rest of this color went into the Zigazig Ah Scarf). Other than that, I went with a dainty cable to suit the light weight of the fiber, and a smaller needle so the ribbing would be nice and tight!

Yarn: Lang Yarns Merino 150 (100% Virgin Wool; 164 yards [150 meters]/50 grams); #197.0085 - one skein

A better look at the cute little pattern.
Needles: One 16" circular needle in size US 3, cable needle (cn)

Notions: Tapestry needle

Gauge: 27 stitches = 4 inches in stockinette on size US 4 needles

So let's make a headband! We'll start by casting on 144 stitches loosely, and then placing a stitch marker and joining in the round. Then we'll move straight to the main pattern, which is a variation on Rib and Braid Pattern from page 201 of Barbara G. Walker's A Second Treasury of Knitting Patterns, and for which you'll need the following notation:

front cross (fc): slip 1 stitch to cn and hold in front; p1, k1 from cn

Wednesday, June 29, 2016

Divine Drape Cowl

Divine Drape Cowl
Divine Drape Cowl

If this cowl is one thing, it's a summer-to-autumn wardrobe staple that would look great in any color, at virtually any length. And if it's two things, it's also yet another one of my attempts at the absolute perfect cowl design: not too bulky around the back of the neck, but with enough fun in the front to attract some attention. And heck, while we're at it - why not make it THREE things -- or in other words, your next project? ;)

Yarn: Premier Yarns Cotton Fair (52% Cotton, 48% Acrylic; 317 yards [290 meters]/100 grams); #27-09 Lavender - one skein

Divine Drape Cowl
The main stitch pattern. Airy
and pretty, no?
Needles: Straight needles in size US 3, straight needles in size US 4, straight needles in size US 8, and straight needles in size US 5 for provisional cast-on

Notions: Tapestry needle

Gauge: 23 stitches = 4 inches in stockinette on size US 4 needles

So let's make a cowl! Using your size 5 needles and a length of scrap yarn, then, cast on 35 stitches provisionally. Transfer work to your size 4 needles and knit two transition rows, as follows:

Transition Row 1 (wrong side): purl

Transition Row 2: knit

Knit these two transition rows, and then transfer work to your size 3 needles and we'll work a ribbing for a bit, like so:

Ribbing Row 1 (wrong side): p1, * k1, p1; rep from * until you reach the end of the row

Ribbing Row 2: k1, * p1, k1 *

Wednesday, June 22, 2016

Kids' Teensy Treasures Bag

Kids' Teensy Treasures Bag
pictured in size medium

I came up with the idea for this bag for a very simple reason: you can find this style EVERYWHERE in Switzerland. Seriously, what I remember (perhaps incorrectly) as a passing fad in the United States took deep roots in Swiss soil, much like the "Parental Advisory" branded clothing and hats that, while virtually extinct stateside, still roam the Swiss countryside like long-hunted wolves. Wait! What am I talking about? Oh yeah - the bag! They're everywhere here, and they're all the same size: adult. Which gave me the oh-so-clever idea to create a variety of kid sizes, since kids, without question, freakin' love bags. Oh, and if you love the look of this too, you're in luck, since the extra-large size is basically just adult. :)

Sizes: Small (Medium; Large; Extra-Large) (approximate finished dimensions: 6" wide by 7.5" tall [8" x 9.5"; 10" x 11.5", 12" x 13.5"])

Yarn: Patons Grace (100% Mercerized Cotton; 136 yards [125 meters]/50 grams); #62628 Fiesta - 2 skeins (2 skeins; 3 skeins; 3 - 4 skeins)

A closer view of the grommet
hole thingamabob. I know, I'm a poet.
Needles: Straight needles in size US 4, one 16" circular needle in size US 5, double pointed needles (dpns) in size US 5 for making i-cords, cable needle (cn)

Notions: Tapestry needle, 3 stitch markers

Gauge: 24 stitches = 4 inches in stockinette

So let's get this started! To begin this bag, then, we'll start by knitting the two drawstring-holding portions at the top separately and back-and-forth before joining them in the round (so the purled strips at the top that your straps lace through). With that in mind, and using your size US 4 needles, cast on 36 (48; 60; 72) stitches loosely. Then work the following rows:

Row 1 (right side): slip 1 stitch, purl until end of row

Row 2: slip 1 stitch, knit until end of row

Knit rows 1 & 2 five times and then knit row 1 once more (all sizes). Then, clip yarn tail and transfer work to your size US 5 circular needle to resume later. Again, using your size US 4 needles, cast on 36 (48; 60; 72) stitches loosely and work rows 1 & 2 five times and row 1 once more, although this time, when you finish, don't clip the tail. Transfer the work you've just finished to your size 5 needle, next to your other piece, making sure that the right sides (purl sides) are both oriented correctly, and that the piece you've just finished, with the running yarn connected, is lined up on the right-hand needle of your circulars so that you can continue work in the round. At that point, join in round, place row marker, and then knit one row around. Then we'll knit one transition/marker placement row, as follows. Since it's different for the different sizes, I have listed each size's row separately for ease.