Wednesday, October 1, 2014

Gradated Rib Leg Warmers

Gradated Rib Leg Warmers

I had the idea for these leg warmers ages ago, and then got distracted by too many other projects to make them happen. Since I had already bought the yarn, however, I finally got to them this last week. And what sets these guys apart is that they actually use two different weights of yarn, as well as a number of different needle sizes, in order to create a small-to-large-to-small-again gradated look. Of course, you could just as easily knit them with a single weight of yarn, with or without the needle size changes (well, you'd definitely want to change needle sizes for the ribbing, but skip the changes for everything else). This pattern is also easy to size, as long as you add or subtract a multiple of four. As written, the pattern is sized to be about 12" around at the top and bottom, and each four stitches added or subtracted will change the size by about 3/4".

Yarn: Cascade Yarns 220 Superwash (100% Superwash Wool; 220 yards [200 meters]/100 grams); #802 Green Apple - one skein (size A), Cascade Yarns 220 Superwash Aran (100% Superwash Merino Wool; 150 yards [137.5 meters]/100 grams); #802 Green Apple - one skein (size B)

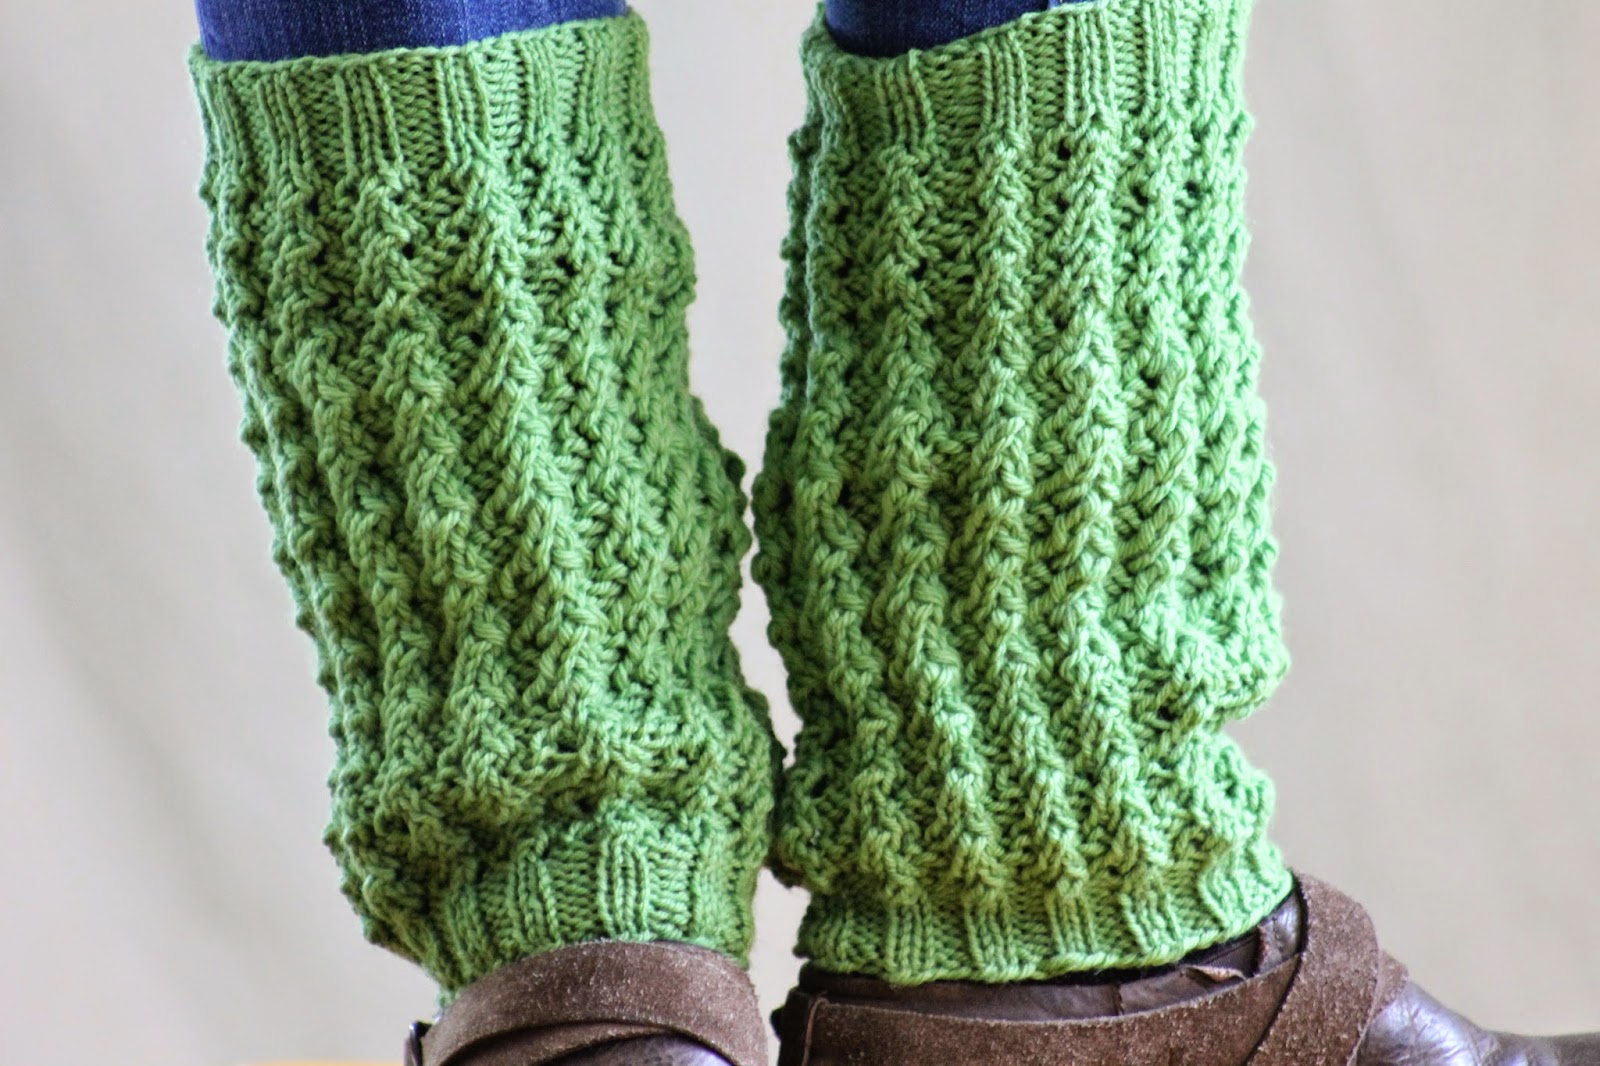
A close up. This pattern uses eyelets and twisted stitches
for a very deep ribbing.
Needles: One set of double pointed needles (dpns) in size 5, one set of dpns in size 7, one set of dpns in size 8, and one set of dpns in size 10

Notions: Tapestry needle

Gauge: 20 stitches = 4 inches on size 7 needles for size A yarn, 18 stitches = 4 inches on size 8 needles for size B yarn

So let's get started! First, using your size 5 needles and your size A yarn, cast on 60 stitches (or 56, or 64, or whatever multiple of four you need to get the size you want) and distribute evenly between 3 dpns (just make sure you have a multiple of four stitches on each needle). Join in round. Then, we'll work the following ribbing row:

Ribbing Row: * p1, k2, p1; rep from *

Wednesday, September 24, 2014

Notched Front Cowl

Notched Front Cowl
Notched Front Cowl

At this point, I imagine that everyone who looks at my patterns regularly has already figured out that I like to come up with new shapes for cowls. And I do, mostly because scarves have become impractical now that my children can use them to try to strangle me (unintentionally, of course). So the Notched Front Cowl is yet another entry into my new-shapes-for-cowls canon, and one that can be styled a couple of different ways (see below for pics). It's also a good design for those who have just begun to knit in the round, or who want more practice with basic increases and decreases.

Yarn: Cascade Yarns Sierra (80% Pima Cotton, 20% Merino Wool; 191 yards [175 meters]/100 grams); #01 (White) - one skein

Notched Front Cowl
The back.
I would have done a close up, but I'm pretty sure you've seen
seed stitch before.
Needles: One 16" circular needle in size 7

Notions: Tapestry needle, three stitch markers

Gauge: 20 stitches = 4 inches

Cast on 101 stitches, place marker, and join in round. Then we'll go straight into a seed stitch for the first part of the pattern. Or in knitting terms, we'll proceed like so:

Row 1: k1, * p1, k1; rep from *

Row 2: p1, * k1, p1 *

Knit rows 1 & 2 until piece measures roughly 3". It doesn't matter which row you end on. And now, we'll knit one transition row to place our extra markers, like so:

Wednesday, September 17, 2014

Stepping Stones Beanie

Stepping Stones Beanie
 
Buying this yarn was a no-brainer; I dig the Berroco Vintage line, and I will still swear that it's a lovely blend of gray and purple (even if my husband, and perhaps everyone else in the world, sees it as a lovely blend of gray and gray). However, it took me a long time to devise a pattern that seemed to suit it. Fortunately, I think the Stepping Stones Beanie takes advantage of both the yarn's weight and its variegation, and would also make a suitable hat for either gender. I would also love to see someone knit the main pattern in a larger needle - perhaps a 10 - to create an even slouchier design that really showed off the yarn overs (and if you do, I want pictures!).
 
Yarn: Berroco Vintage Colors (50% Acrylic, 40% Wool, 10% Nylon; 217 yards [200 meters]/100 grams); #5215 Smokestack - one skein
 
A closer view of the pattern.
Needles: one 16" circular needle in size US 6, one 16" circular needle in size US 8, and one set of double pointed needles (dpns), also in size US 8

Notions: Tapestry needle, stitch marker
 
Gauge: 18 stitches = 4 inches in stockinette

So let's make a hat! Using your size 6 circular needle, cast on 96 stitches, place marker, and join in round. Then we'll knit the following ribbing row:

Ribbing Row: * p1, k2, p2, k2, p1; rep from *

Knit this ribbing row 8 times, and then switch to your size 8 circular needle (or a 10, if you want to make a slouchier hat. Let me reiterate: I want pictures!). Now, we'll move on to the main pattern, for which we'll need the following notation:

Wednesday, September 10, 2014

Star Cluster Mini Shawl

Star Cluster Mini Shawl

I was only a few rows into the Twin Leaf Cowl when I realized that I absolutely wanted to work with the yarn again, especially since it was on clearance at my local store and I didn't know how much longer it would be available. So I bought another color of the stuff, this (in my opinion) gorgeous red. Then, I held on to it for a few months until inspiration struck in the form of this scarf-like thing, the Star Cluster Mini Shawl. Long story short, I've had this item on my mind for a while, and I couldn't be happier about how it turned out! As a warning, however, this item does use a few intermediate techniques, such as a provisional cast on and some short rows.

Yarn: Schoeller + Stahl Spray (100% Cotton; 153 yards [140 meters]/50 grams); #8 - two skeins

The pattern
Needles: Straight needles in size US 8, straight needles in size US 10 - 11

Notions: Tapestry needle
Gauge: 24 stitches = 4 inches in stockinette on size US 4 needles

To make this piece, we're going to begin in the middle, work one half, and then pick up stitches from the middle to work the other half again (by using a provisional cast on, not by actually picking up stitches). So, using your largest gauge needles and the provisional cast-on technique, cast on 71 stitches. Then switch to your size 8 needles and purl one row cross. Once that's done, we'll begin our pattern, which features the Star Cluster from page 217 of Barbara G. Walker's A Second Treasury of Knitting Patterns and a decrease worked every odd row. First comes the terminology, and then the pattern.

Cluster 2 (c2): slip 2 stitches with yarn in back, bring yarn to front between needles, slip the same 2 stitches back to your left hand needle, pass yarn to back between needles, and then slip the same to stitches with yarn in back again