Showing posts with label worsted. Show all posts

Wednesday, April 29, 2015

Feathered Arrow Headband

Feathered Arrow Headband

One of knitting's greatest challenges (in my opinion, at least) is finding a good way to use your yarn scraps. I never have the heart to throw them away, after all, and then I never have quite enough yarn to do anything really spectacular with my leftovers. Luckily, the humble headband can be a great solution to this problem - quick, fun, and gratifying to knit, they're also highly wearable and a great gift. Case in point: the Feathered Arrow Headband, which uses less than 50 yards of yarn and is easy to customize for teens to adults.

Yarn: Patons Classic Wool (100% Pure New Wool; 210 yards [192 meters]/100 grams); #202 (Cream) - one skein
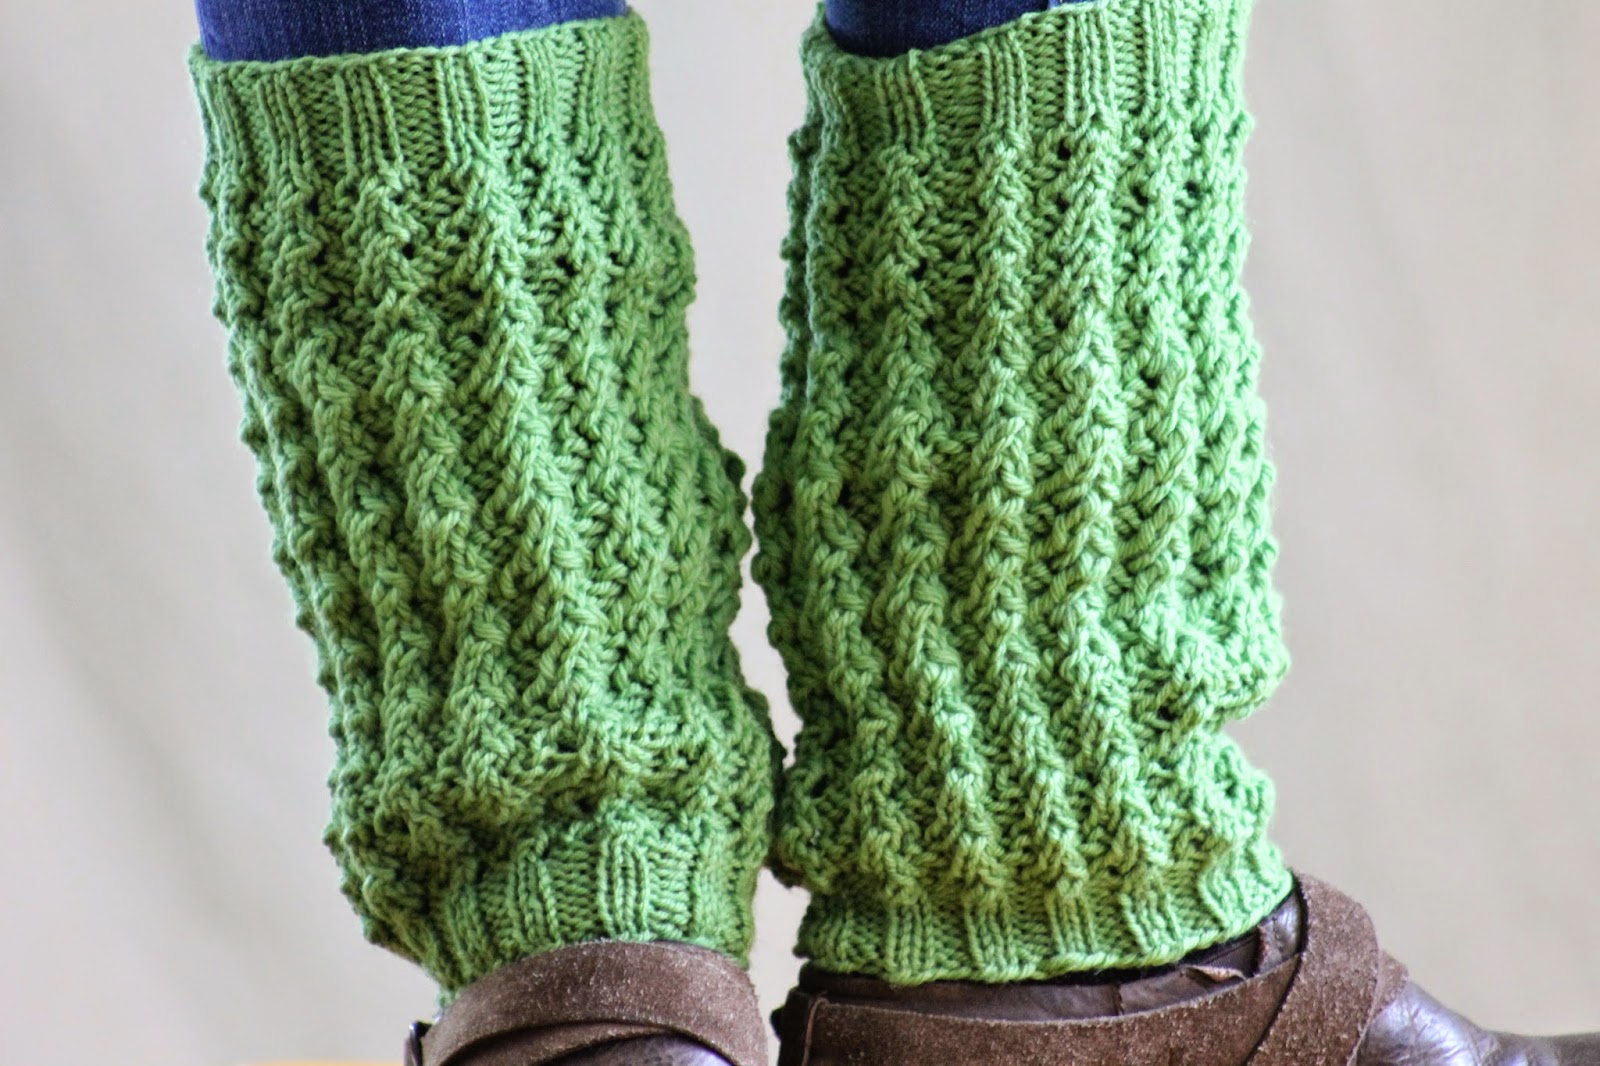
The pattern.
Subtle, but niiiiice.


Needles: straight needles in size US 8, straight needles in size US 10 (for provisional cast-on)

Notions: Tapestry needle, stitch marker

Gauge: 18 stitches = 4 inches

So let's make a headband! First, then, using your size 10 needles and a provisional cast on, cast on 17 stitches loosely. Then, we'll move straight to our size US 8 needles and our main pattern, which is Expanded Feather Pattern from page 194 of Barbara G. Walker's A Treasury of Knitting Patterns, and goes as follows:

Wednesday, April 8, 2015

Nom Nom Garter Hat

Nom Nom Garter Hat

You may be wondering why this thing is called the Nom Nom Garter Hat. The answer to that question is simple - it's because it will eat up your yarn scraps like "nom nom nom!" Before we get started, however, I should tell you a couple of things - first of all, you need roughly 50 yards each of your two main colors in order to get this hat going. Provided you have that, you can do your accent colors with quite small amounts of any worsted- or dk-weight yarns (or smaller, if you hold two strands together!). Also, I wrote my color combination out here so that you could make the hat with the exact same color scheme, if you wanted. Please, however, feel free to ignore my accent coloring (colors C - J), and do your own instead! If you choose to do this, however, you'll definitely want to pay attention to the length of the stockinette stripe on this hat - it is a better indication of the finished length than the garter stitch. To make the color pop, after all, you'll be blocking the snot out of this thing, and the garter will stretch a LOT.

Oh, and last but not least - I designed this hat back-and-forth, both for my peeps who avoid circular knitting, and because that's the only way to truly take advantage of the garter stitch. If you need help converting the pattern for circular knitting, just ask!

Sizes: Adult Small (Adult Large)

Yarn: Cascade Yarns 220 Superwash (100% Superwash Wool; 220 yards [200 meters]/100 grams); #1948 Mystic Purple - one skein (color A), #908 Magenta - one skein (color B) & various scrap yarns in worsted & dk weights (colors C - J) - roughly 50 yards total

This is how I kept my colors straight!
My children thought I was working on a cool
art project, at least.
Needles: straight needles in size US 7

Notions: Tapestry needle, stitch marker

Gauge: 20 stitches = 4 inches in stockinette, 16 stitches = 4 inches in garter

So let's get started! First, then, using your color A yarn, cast on 82 (90) stitches. Then we'll work the edging rows like so:

Row 1: using color A, p3, knit until you have 3 stitches left in row, p3

Row 2: using color C, knit

Wednesday, March 25, 2015

Beauty of a Basketweave Hat


Beauty of a Basketweave Hat

Recently, AllFreeKnitting offered me the opportunity to review this yarn, Brown Sheep Company's Lanaloft, and design an exclusive pattern for their site. And obviously, since I'm only human (and cannot resist the thought of receiving yarn IN THE MAIL like it's freaking magic), I jumped at the chance. For now, you'll have to visit their site to find the pattern, though. You can find more pictures and the link below. :)

Yarn: Brown Sheep Company, Inc. Lanaloft (100% Wool; 160 yards [146 meters]/100 grams); LL83W Victorious Violet – 1 skein

That, my friends, is a basketweave.
Needles: one 16” circular needle in size US 7, one 16” circular needle in size US 8, one set of double pointed needles (dpns), also in size US 8

Notions: stitch marker, tapestry needle

Gauge: 18 stitches = 4 inches on size US 8 needles

As promised, then, you can find the rest of the pattern here. Make it, and be merry!

Wednesday, March 18, 2015

Minky Mittens

Minky Mittens

I've been plotting another pair of mittens for awhile now. In fact, I've been plotting them for so long that I didn't manage to complete them until our first spring-ish week here in Wisconsin (oops). While my timing is terrible, however, these mittens are not; made with a slip stitch color pattern, they are thick and warm, and can be sized from toddlers to adults. Now I just have to hope my kids don't grow out of them before next winter...

Sizes: Toddler (Child Small; Child Medium; Child Large/Adult Small; Adult Medium; Adult Large)

Yarn: Cascade Yarns 220 Superwash (100% Superwash Wool; 220 yards [200 meters]/100 grams); #1946 Silver Grey - one skein (color A), #810 Teal - one skein (color B for the toddler sized mittens) & #9863 Spring Meadow - one skein (color B for the children's small mittens)

The pattern. Plus an eye! Notice how the variegated color B
yarn changes the look of the mitten.
Needles: One set of double pointed needles (dpns) in size US 5, one set of dpns in size US 7

Notions: Tapestry needle

Gauge: 20 stitches = 4 inches on size 7 needles

So let's do this thang! Using your size 5 needles and your color A yarn, cast on 30 (34; 36; 40; 44; 48) stitches and divide evenly between 3 dpns. Join in round. Then knit the following ribbing row:

Ribbing Row: * k1, p1; rep from *

Knit this ribbing row until ribbing measures 1.5" (1.5"; 1.75"; 2.25"; 2.25"; 2.5"). Then switch to your size 7 needles and knit one row around, still in your color A yarn. And once that's done, we'll work a few more rows before we gusset in the thumb, as follows:

Wednesday, March 11, 2015

Diana's Cowl

Diana's Cowl

The story behind this cowl is simple: a lovely friend sent me a wonderful Galentine's Day package, and I wanted to reciprocate with a knit good (or a good knit! See what I did there? Yes, I'll show myself out...). Anyway, she gave me the item and the color, and I designed something that (I hope) will suit her perfectly. And while this particular item is made extra-scrumptious by the alpaca yarn, I think a cotton or silk would also suit it well.

Yarn: Cascade Yarns Pure Alpaca (100% Baby Alpaca; 220 yards [200 meters]/100 grams); #3003 Ruby - one skein

The pattern. It's got holes!
Needles: One 16" circular needle in size US 7

Notions: Tapestry needle, three stitch markers

Gauge: 18 stitches = 4 inches in stockinette

So let's do this! First, cast on 91 stitches loosely, place marker, and join in round. Then we'll knit the following marker placement row:

Marker Placement Row: k1, (p1, k1) 17 times, place marker, k21, place marker, k1, * p1, k1; rep from * until end of round

And now we'll move on to a few edging rows that begin to use our pattern, which incorporates a strip of Double Herringbone Mesh from page 301 of Barbara G. Walker's A Second Treasury of Knitting Patterns, and goes as follows:

Edging Row 1: p1, * k1, p1 * until you reach first marker, slip marker, k2, (yo, ssk) 3 times, yo, slip 1-k2tog-psso, (yo, k2tog) 4 times, yo, k2, slip marker, p1, * k1, p1 *

Edging Row 2: k1, * p1, k1 * until you reach first marker, slip marker, knit until next marker, slip marker, k1, * p1, k1 *

Wednesday, March 4, 2015

Lace Cable Fingerless Gloves

Lace Cable Fingerless Gloves

First and foremost: I highly recommend against viewing these photos larger. We are in the middle of a cold, dry winter here in Wisconsin, and my hands are SCARY. Luckily, not everything is quite so terrifying. And that includes these gloves, which are designed and knit on straight needles for all of my dpn-despising peeps. Of course, if one of my dpn-loving peeps wants to see this pattern adapted for the round, just hit me up in the comments and I'll help you out too!

Sizes: small (medium; large) (the small will fit a hand roughly 7" - 8" in circumference at the base of the thumb, the medium a hand about 8" - 9", and the large 9" +)

Yarn: Cascade Yarns Cascade 220 Heathers (100% Peruvian Highland Wool; 220 yards [200 meters]/100 grams); #9461 Lime Heather - one skein

A close up of the pattern.
Leafy, no?
Needles: One set of needles in size US 7, one set of needles in size US 5, one cable needle (cn)

Notions: Tapestry needle, two stitch markers

Gauge: 20 stitches = 4 inches on size 7 needles

So let's get started! We're going to work our two gloves a teensy weensy bit differently (the cables will be reversed). So, for the first one, you'll start by using your size 5 needles, and casting on 38 (42; 46) stitches loosely. Then we'll work the following ribbing rows, which will be the same for all sizes:

Ribbing Row 1 (wrong side): p2, * k2, p2; rep from *

Wednesday, February 25, 2015

Iris Bloom Bonnet

Iris Bloom Bonnet

First and foremost: yes, this yarn is divine. Simply heavenly. Gorgeous, lovely to knit, and beautifully variegated. But even if you don't have or can't find this particular fiber, you're in luck, because I have a sneaking suspicion that this super fun hat would look great in almost any worsted weight yarn. And if that's not incentive enough to make this hat, then consider this: I actually wrote up two patterns for this little beauty - one version that includes knitting in the round, and one that's made entirely on straight needles. Both begin in the same way, below. 

Note as of 11/24/15: This hat fits like an adult small. I have adapted the in-the-round version of the pattern for an adult large in the comments below. :)

Update February 22, 2021: For some reason, the comments no longer seem to work on this post. Please email me with any questions at ballstothewallsknits@gmail.com.

Yarn: Malabrigo Rios (100% Merino Superwash; 210 yards [192 meters]/100 grams); #416 Indiecita - one skein

This stitch pattern makes me wanna say "yeah!"
My kids would be so embarrassed.

Needles: One set of straight needles in size US 5, one set of straight needles in size US 7, one 16" circular needle in size US 7, and one set of double pointed needles (dpns), also in size US 7 (if you're knitting it entirely on straight needles, you don't need the circulars or dpns)

Notions: Tapestry needle, three stitch markers

Gauge: 18 stitches = 4 inches in stockinette

So let's get started! For either version of this hat, we'll be working from the brim of the piece, and we'll begin by working back and forth rather than in the round. As such, using your straight needles in size US 5, cast on 118 stitches loosely. Then work the following rows:

Edging Row 1 (wrong side): p2, * k2, p2; rep from *

Edging Row 2: k2, * p2, k2 * 

Wednesday, February 11, 2015

Little Ridges Fauxflap Hat

Little Ridges Fauxflap Hat

There are only a few notes with this hat - first off, yes, I've gotten obsessed with earflap hats. They're so cute! Etc. Of course, this one isn't a true earflap hat, since the flaps are worked with shaping instead of separately to give it a different twist. And secondly, my gauge didn't match the package on this hat. And as always with a hat that's knit mostly in stockinette, that's actually important to know.

Sizes: Child (Teen/Small Adult; Large Adult)

Yarn: Berroco Vintage (52% Acrylic, 40% Wool, 8% Nylon; 218 yards [200 meters]/100 grams); #5160 Wild Blueberry (color A) – one skein &
#5177 Douglas Fir – one skein (color B)

A closer view of the pattern
Needles: one 16" circular needle in size US 7, and one set of double-pointed needles (dpns) in size US 7, plus one size US 9 or larger 16" circular needle for provisional cast on

Notions: Tapestry needle, five stitch markers

Gauge: 18 stitches = 4 inches on size 7 needles

So let's get started! Using your largest needle and your color A yarn, cast on 80 (90; 100) stitches provisionally (instructions for this cast on can be found here). Transfer stitches to your size 7 needle, place marker, and join in round. Then knit the following set-up rows:

Set-up Rows 1 & 2: using color A, knit

And now it's time to move to our color pattern, which goes as follows:

Wednesday, January 28, 2015

Doug Fir Mittens

 
Doug Fir Mittens

I don't have a terribly entertaining story about these mittens, but I'll tell it anyway. First, I wanted to design a pair. Then, I did. And though the Doug Fir Mittens are definitely on the basic side, they also have a few nice features. The cuffs, for instance, are long enough to tuck into your jacket and keep your wrists warm. Plus, the tops are nice and tapered! With any luck, I'll also be adding some kid sizes soon, although these are only sized for adults.

Sizes: Small Adult (Medium Adult; Large Adult) (the small is for a hand roughly 7 1/2" - 8" in circumference at the base of the thumb and 7" from base of palm to fingertips, and the large for a hand roughly 8 1/2" - 9" in circumference at the base of the thumb and 8" from base of palm to fingertips - and finally, go medium if you're between)

Yarn: Berroco Vintage (52% Acrylic, 40% Wool, 8% Nylon; 218 yards [200 meters]/100 grams); #5177 Douglas Fir – one skein (all sizes)

The thumb join. Yup, looks like a thumb.
Needles: one set of double-pointed needles (dpns) in size US 7, one set of dpns in size US 5

Notions: Tapestry needle

Gauge: 20 stitches = 4 inches on size 7 needles

So let's get started! Using your size 5 needles, cast on 40 (40; 44) stitches and then distribute the stitches between your needles as follows: 12 stitches on the first needle, 16 stitches on the second needle, and 12 stitches on the third needle (12 stitches on the first needle, 16 stitches on the second needle, and 12 stitches on the third needle; 14 stitches on the first needle, 16 stitches on the second needle, and 14 stitches on the third needle). Join in round, and then proceed as follows:

Ribbing Row 1: * p1, k2, p1; rep from *

Wednesday, January 21, 2015

Belt Welt Hat

Belt Welt Hat

First, I should mention that I'm pretty sure this is the most expensive skein of yarn I've ever purchased, and it was WORTH EVERY PENNY! So smooth, so wonderful to knit - seriously, I would take a bath in the stuff if I could afford it. Luckily, you don't have to use this luxurious of a yarn to make this pattern pop - any heavier weight worsted should do. But perhaps the best thing about this pattern is that it's a pretty simple knit that still yields a lot of graphic appeal. Or in other words, you won't have to put in a lot of work in order to end up with a hat that you'll be pleased with.

Sizes: Small Adult (Large Adult)

Yarn: Simplinatural by HiKoo by Skacel (40% Baby Alpaca, 40% Fine Merino Wool, 20% Mulberry Silk; 183 yards [167 meters]/100 grams); #098 Bright Blue – one skein (both sizes)

The finish.
Needles: one 16" circular needle in size US 6, one 16" circular needle in size US 8, one set of double pointed needles (dpns), also in size US 8 (one 16" circular needle in size US 7, one 16" circular needle in size US 9, one set of dpns, also in size US 9)

Notions: Tapestry needle, stitch marker

Gauge: 18 stitches = 4 inches on size 8 needles, 16 stitches = 4 inches on size 9 needles

So let's get one thing straight, here. The only difference between the size small hat the large is needle size - if you want to make a small hat, use 6s and 8s. If you want a large hat, use 7s and 9s! And now that we've got that taken care of, using your smaller circular needle, cast on 90 stitches, place marker, and join in round. Then we'll knit the following ribbing row:

Ribbing Row: * p1, k1; rep from *

Knit this ribbing row until piece measures 4". And now, it's time to switch to your larger needles and the main pattern, which is Belt Welt from page 6 of Barbara G. Walker's A Second Treasury of Knitting Patterns, and goes as follows:

Saturday, January 10, 2015

Double Pom Earflap Hat

Double Pom Earflap Hat

As I've mentioned before, every once in a while, one of my children decides that they need something new and then pesters me until I make it for them. Such was the case with this hat. My three-year-old has a friend with a double pompom hat; hence, he needed one too. Luckily, he is less picky than my five-year-old, and let me pick the stitch pattern. And this two-color design looks fantastic in person and adapts perfectly to the round. Oh, and did I mention that I've sized this hat to fit everyone from toddler to adult as well???*

* I've also updated the marker placement rows of this pattern as of January 14, 2016 (they were missing a marker!).

Sizes: Toddler (Child; Small Adult; Large Adult)

Yarn: Cascade 220 Superwash (100% Superwash Wool; 220 yards [200 meters]/100 grams); #809 Really Red – one skein (color A) and #871 White - one skein (color B) (all sizes)

The pattern. It's a winner!
Needles: One 16" circular needle in size US 7, one set of double-pointed needles (dpns), also in size US 7 (for working the i-cords), one US 9 or larger needle for provisional cast on

Notions: Tapestry needle, stitch marker, stitch holders or scrap of yarn for holding stitches

Gauge: 20 stitches = 4 inches in stockinette on size 7 needles

So let's get started! Using your large needle, your color A yarn and a provisional cast on, cast on 90 (96; 102; 108) stitches, place marker, and join in round. Transfer work to your 16" size 7 circular needle and knit four rows around. Switch to your color B yarn and knit one row around. And now, it's time to begin our pattern, which is Cage Pattern from page 65 of Barbara G. Walker's A Second Treasury of Knitting Patterns, and goes as follows:

Row 1: using your color A yarn, * slip 2 with yarn in back (wyib), k4; rep from * 

Row 2: using your color A yarn, * slip 2 wyib, p4 *

Wednesday, January 7, 2015

I Dream of Beaches Cowl

I Dream of Beaches Cowl

A reader recently asked me if I had any true infinity style cowls, and I had to say no. And while this cowl isn't technically an infinity cowl either, you could totally make it that way! I even provide instructions! Whether you create a Möbius strip with this thing or not, however, it's a nice, completely seamless lightweight cowl that will suit either the winter or the spring that will eventually come. So whenever you wear it, you can dream of beaches...

Yarn: Berroco Fuji (38% Silk, 25% Cotton, 22% Rayon, 15% Nylon; 125 yards [115 meters]/50 grams); #9203 Sandy - 2 skeins

The back. Seamless, I tell ya!
Needles: One set of needles in size US 7, one set of needles in size US 10, and one cable needle (cn) or double pointed needle for cabling

Notions: Tapestry needle

Gauge: 20 stitches = 4 inches on size 7 needles

So let's get started! As I mentioned, this piece is perfectly seamless, which means we'll be starting with a provisional cast on. Using your size 10 needle, then, cast on 30 stitches provisionally. Transfer stitches to your size 7 needle, and then proceed as follows with some set up rows, as you'll find below. Oh, and here's the notation we'll need:

front cross (fc): slip 4 stitches to cn and hold in front; k4; k4 from cn

Wednesday, December 31, 2014

Coin & Medallion Hat

Coin & Medallion Hat

Everything about this hat was inspired by the yarn, since the color strikes me as a perfect match for the coin and medallion cables. And not only is this stuff a gorgeous shade, it also has a lovely feel, as buttery as the hue. I will note, however, that if you're making this hat for a larger-headed person, you will probably want to use a slightly heavier weight worsted, or even a light chunky (think more like 16 stitches per four inches). You can size your needles up as needed.

Yarn: Malabrigo Worsted (100% Merino Wool; 210 yards [192 meters]/100 grams); #022 Sauterne – one skein

Needles: one 16" circular needle in size US 9, one 16" circular needle in size US 6, one set of double pointed needles (dpns), also in size 9, and one cable needle (cn)

Notions: Tapestry needle, 3 stitch markers

Gauge: 18 stitches = 4 inches on size 8 needles

Edit as of 3/07/15: Raveler sandeleh has very kindly created charts for this hat, which you can find as images at the bottom of this post. The only note is that the cables in the chart do not contain twisted stitches, while as in the written pattern, they do. You can twist or not twist at your leisure. Also, row 1 of the chart is the ribbing row - you will, naturally, want to repeat it more than once, as directed. And please just email if you want a bigger version of the charts (ballstothewallsknits@gmail.com). Thanks again sandeleh!!! :)

So let's get started! Using your size 6 needle, cast on 96 stitches, place marker, and join in round. Then we'll work on the ribbing row, as follows:

Ribbing Row: * k1, p1, (k2, p2) twice, k2, p1, (k2, p2) twice, k2, p1 * 

Knit this ribbing row until piece measures about 1 1/4", and then switch to your size 9 needle. Now, it's time to begin our main pattern, which is a combination of Coin Cable and a modified version of Tyrolean Medallion, from Barbara G. Walker's A Treasury of Knitting Patterns (on pages 261 and 247, respectively). To do these, let's first define some terms.

Wednesday, December 24, 2014

Fantastic Welted Cowl

Fantastic Welted Cowl

Sometimes, all you need is a simple cowl with a lot of texture. And if that's what you're looking for, the Fantastic Welted Cowl fits the bill, with both a ripple effect and purled accents. Furthermore, though I've pictured the child size, you can also make it for an adult or a toddler. So cute!

Sizes: Toddler (Child; Adult)

Yarn: Plymouth Yarn Jeannee (55% Cotton, 45% Acrylic; 111 yards [101 meters]/50 grams); #08 - 1 skein (2 skeins ; 2 skeins)

A better picture of the pattern
Needles: 16" circular needle in size US 8, 16" circular needle in size US 7

Notions: Tapestry needle, stitch marker

Gauge: 18 stitches = 4 inches

So let's do this! First, using your size 7 needle, cast on 77 (88; 99) stitches, place marker, and join in round. Then we'll knit a few edging rows, as follows:

Edging Row: * (k1, p1) twice, k3, (p1, k1) twice; rep from *

Knit edging row 4 (4; 6) times, and then switch to your size 8 needle. Next, we'll move on to our main pattern, which is Welting Fantastic from page 143 of Barbara G. Walker's A Treasury of Knitting Patterns, except adapted for the round. And it goes as follows:

Rows 1, 3, & 5: purl

Wednesday, December 17, 2014

Five Pillars Hat

Five Pillars Hat

I would tell you how many times I frogged this thing, except I can't count that high. Okay, so I'm exaggerating. But it is no exaggeration that I put extra work into the Five Pillars Hat to make it not just run of the mill, but extraordinary. And although the design is unisex, I highly recommend knitting it with a slightly larger gauge yarn if you're making it for a larger-headed person or a man (think 15 stitches = 4 inches instead of 16, and possibly a size US 10 needle to get your gauge). Oh, and, as of October 6, 2015, I've charted this pattern. You can find the chart below*. :)

* Updated as of 08/22/16

Yarn: Cascade Yarns 220 Superwash Aran (100% Superwash Merino Wool; 150 yards [137.5 meters]/100 grams); #817 Aran - one skein

The back.
Needles: One 16" circular needle in size US 7, one 16" circular needle in size US 9, one set of double pointed needles (dpns), also in size US 9, and a cable needle (cn) or double pointed needle for cabling

Notions: Tapestry needle, stitch marker

Gauge: 16 stitches = 4 inches on size 9 needles

So let's make a hat, eh? First, then, using your size 7 needle, cast on 85 stitches, place marker, and join in round. Then we'll work a few ribbing rows, as follows:

Ribbing Row: * knit two stitches through their back loops (k2-tbl), (p1, k1) 6 times, p1, k2-tbl; rep from *

Wednesday, December 10, 2014

Around We Go Headband

Around We Go Headband

The story behind this piece is simple: recently, I saw one of the other moms at my kids' preschool in a knitted headband similar to this one and I thought, "hey, that's cool." And yes, the story is boring, but the finished product is still striking, with lots of graphic appeal. It's also very easy to size to various lengths, which I'll talk about more in a bit, and is a great stashbuster. Yay, busting stashes!

Sizes: Child (Adult)

Yarn: Cascade Yarns Cascade 220 Heathers (100% Peruvian Highland Wool; 220 yards [200 meters]/100 grams); #2439 Gelato - one skein

The pattern.
Plus some of the fine make up airbrushing that went into
my lovely fake head.
Needles: One set of needles in size US 7

Notions: Tapestry needle

Gauge: 20 stitches = 4 inches

So let's get started! To begin, cast on 18 (22) stitches. Then we'll move right to the main pattern, which I've written separately for each size. First, then, the terminology:

rt (right twist): knit two together, leaving stitches on left-hand needle; next, insert right-hand needle from the front between the two stitches just knitted together, and knit the first stitch again.  Finally, slip both stitches from left-hand needle together

lt (left twist): with right-hand needle behind left-hand needle, skip one stitch and knit the second stitch in back loop; then insert right-hand needle into the backs of both stitches and k2tog-b (knit two together through back loops, inserting right needle from the right)

Wednesday, November 26, 2014

Sailor's Rib Cowl

Sailor's Rib Cowl

I bought this yarn nearly a year ago, I believe, with the intention of making a nice scarf for my husband with it. But since he was never very enthusiastic about said scarf, it never got made. And then he renewed his determination to bike commute this winter and it dawned on both of us: he didn't need a scarf, he needed a cowl. A nice, snug, long cowl that he can pull up over his face when the temperatures dip into the teens and the winds are blowing. And, to be quite honest, I'm kind of amazed that the idea never occurred to me before. After all, while I doubt he'll start wearing this cowl as a new man fashion statement (not because it isn't pretty, but because I haven't seen many men in cowls), it tucks into a jacket with much less bulk than a scarf, and looks just as nice.

Yarn: Cascade Yarns Cascade 220 (100% Peruvian Highland Wool; 220 yards [200 meters]/100 grams); #9458 Bainbridge Island Heather - 1 skein

A closer look at the pattern
Needles: 16" circular needle in size US 7

Notions: Tapestry needle, stitch marker

Gauge: 20 stitches = 4 inches

So let's make this bad boy! First, cast on 100 stitches, place marker, and join in round. And then we'll move straight to the main pattern, which is Fisherman's Rib from page 4 of Barbara G. Walker's A Second Treasury of Knitting Patterns, except adapted for the round. Anyway, it goes as follows:

Wednesday, November 12, 2014

All in the Family Earflap Hat

All in the Family Earflap Hat
Child Size

Although I've made hats of many other silhouettes, a reader recently reminded me that I had yet to post an earflap. And this reminder instantly reminded me of yet another thing - namely, that the last time I made an earflap hat, I had far fewer knitting techniques in my toolbox, and ended up having to cobble together a hat, some flaps, and some weird cast-ons with a crocheted edging, to hide the mess. Now that I've progressed, however, I designed this All in the Family Earflap Hat with a basic but rather elegant design that uses a provisional cast on for a seamless, nicely finished look. Plus, it doesn't require any crocheted hoo-ha for the edging (although of course you're welcome to crochet as much hoo-ha as you like; no judgment here). Also, as a note, I should mention that, though I very much enjoyed this yarn, I found the gauge recommendations to be WAY off. Thusly (and especially with a basic stockinette hat such as this), I highly recommend that you check your gauge before accidentally knitting a hat that would fit the Jolly Green Giant better than your kid.

Sizes: Toddler (Child; Small Adult; Large Adult) (in measurements, and roughly, the toddler size should fit an 18" - 19" inch head, the child a 19.5" - 21" inch head, the small adult up to a 21" head, and the large adult up to a 23" head)

Yarn: Berroco Ultra Alpaca (50% Alpaca, 50% Wool; 215 yards [198 meters]/100 grams); #6288 Blueberry Mix - 1 skein

From the side.
Needles: 16" circular needle in size US 8, one set of double pointed needles (dpns), also in size US 8, and one 10 or 10 1/2 needle for the provisional cast on

Notions: Tapestry needle

Gauge: 16 stitches = 4 inches

So let's get started! Using your largest needle and a provisional cast on, cast on 70 (77; 77; 84) stitches. Then, transfer stitches to your size 8 circular needle, place marker, and join in round. Knit until piece measures about 5.5" (6"; 7.5"; 8"), and then we'll begin the decreases, as follows. Remember to switch to your dpns once you're down to about 60 stitches.

Decrease Row 1: * k5, k2tog; rep from *

Decrease Row 2: knit

Decrease Row 3: * k4, k2tog *

Wednesday, October 22, 2014

Rose Briar Bag

Rose Briar Bag

I'll admit it; my reasons for designing this Rose Briar Bag are totally self-serving. Namely, I think it will make a nice holiday gift, when the time comes. Of course, it has other nice details as well, such as the triangular base (it's knit bottom-up) and the lace stripes. As pictured, it's also finished with a three needle bind off to attach the handles, although you're welcome to seam them instead.

Yarn: Lily Sugar 'n Cream (100% Cotton; 120 yards [109 meters]/70.9 grams); #01322 Lilac - 3 skeins

A closer look
Needles: One 16" circular needle in size US 7, and one set of double pointed needles, also in size US 7, size 10 or larger needles for provisional cast on, and one 24" circular needle in size US 7 (recommended but not required)

Notions: Tapestry needle, four stitch markers

Gauge: 20 stitches = 4 inches in stockinette on size 7 needles

First and foremost, let's knit some handles! So, using your largest needles and a provisional cast on, cast on 11 stitches (if you plan to seam this bag rather than use the three needle bind off to attach the handles, you don't need to use a provisional cast on). Then switch to whichever set of size 7 needles you want to work back and forth on and knit the following set-up rows:

Set-up Rows 1 & 3 (wrong side): p11

Set-up Row 2: k11

Wednesday, October 1, 2014

Gradated Rib Leg Warmers

Gradated Rib Leg Warmers

I had the idea for these leg warmers ages ago, and then got distracted by too many other projects to make them happen. Since I had already bought the yarn, however, I finally got to them this last week. And what sets these guys apart is that they actually use two different weights of yarn, as well as a number of different needle sizes, in order to create a small-to-large-to-small-again gradated look. Of course, you could just as easily knit them with a single weight of yarn, with or without the needle size changes (well, you'd definitely want to change needle sizes for the ribbing, but skip the changes for everything else). This pattern is also easy to size, as long as you add or subtract a multiple of four. As written, the pattern is sized to be about 12" around at the top and bottom, and each four stitches added or subtracted will change the size by about 3/4".

Yarn: Cascade Yarns 220 Superwash (100% Superwash Wool; 220 yards [200 meters]/100 grams); #802 Green Apple - one skein (size A), Cascade Yarns 220 Superwash Aran (100% Superwash Merino Wool; 150 yards [137.5 meters]/100 grams); #802 Green Apple - one skein (size B)

A close up. This pattern uses eyelets and twisted stitches
for a very deep ribbing.
Needles: One set of double pointed needles (dpns) in size 5, one set of dpns in size 7, one set of dpns in size 8, and one set of dpns in size 10

Notions: Tapestry needle

Gauge: 20 stitches = 4 inches on size 7 needles for size A yarn, 18 stitches = 4 inches on size 8 needles for size B yarn

So let's get started! First, using your size 5 needles and your size A yarn, cast on 60 stitches (or 56, or 64, or whatever multiple of four you need to get the size you want) and distribute evenly between 3 dpns (just make sure you have a multiple of four stitches on each needle). Join in round. Then, we'll work the following ribbing row:

Ribbing Row: * p1, k2, p1; rep from *